
Page 132 - Enhancing CAD Drawings with Photoshop
P. 132
4386.book Page 115 Monday, November 15, 2004 3:27 PM
EXTRACTING ENTOURAGE 115
The initial preview is rough; parts of the background show through the tree itself. You can
improve the extraction by working with the versatile Cleanup tool. When you use this tool
“normally,” it removes opacity from the pixels in the preview. Using it in combination with the
Alt key works in reverse, adding back opacity from the background into the preview. Either
way you use the Cleanup tool, it works cumulatively, so multiple passes subtract or add more
pixels as you go.
NOTE The Cleanup tool does not function like an airbrush, so holding the mouse down for a period
of time does not increase its effect. Slight movement of the mouse, however, produces cleanup.
This part of the extraction process is most like an art and probably will require some practice.
The process is a bit like visual sculpture, as you work to liberate the object from a matrix of
background pixels.
Try to avoid using a small brush size when cleaning up internal areas, or you will be able to
perceive the round brush shape in the extracted image. Make several passes with the tool and
build up changes slowly.
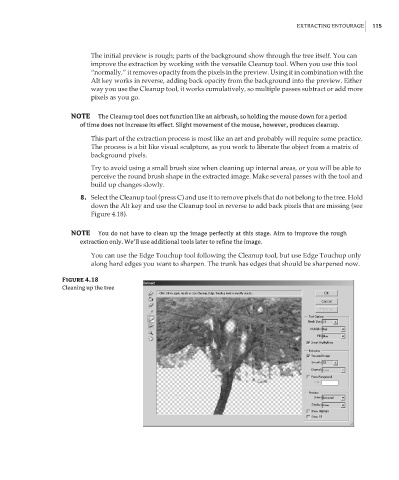
8. Select the Cleanup tool (press C) and use it to remove pixels that do not belong to the tree. Hold
down the Alt key and use the Cleanup tool in reverse to add back pixels that are missing (see
Figure 4.18).
NOTE You do not have to clean up the image perfectly at this stage. Aim to improve the rough
extraction only. We’ll use additional tools later to refine the image.
You can use the Edge Touchup tool following the Cleanup tool, but use Edge Touchup only
along hard edges you want to sharpen. The trunk has edges that should be sharpened now.
Figure 4.18
Cleaning up the tree