
Page 137 - Enhancing CAD Drawings with Photoshop
P. 137
4386.book Page 120 Monday, November 15, 2004 3:27 PM
120 CHAPTER 4 YOU AND YOUR ENTOURAGE
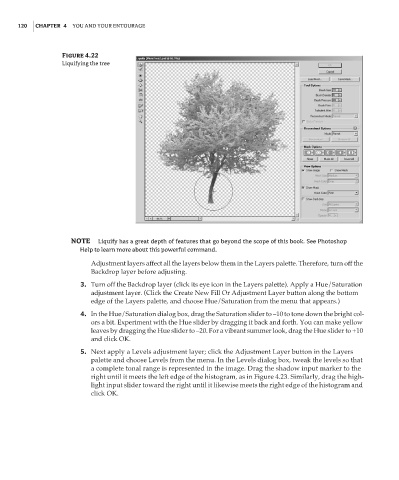
Figure 4.22
Liquifying the tree
NOTE Liquify has a great depth of features that go beyond the scope of this book. See Photoshop
Help to learn more about this powerful command.
Adjustment layers affect all the layers below them in the Layers palette. Therefore, turn off the
Backdrop layer before adjusting.
3. Turn off the Backdrop layer (click its eye icon in the Layers palette). Apply a Hue/Saturation
adjustment layer. (Click the Create New Fill Or Adjustment Layer button along the bottom
edge of the Layers palette, and choose Hue/Saturation from the menu that appears.)
4. In the Hue/Saturation dialog box, drag the Saturation slider to –10 to tone down the bright col-
ors a bit. Experiment with the Hue slider by dragging it back and forth. You can make yellow
leaves by dragging the Hue slider to –20. For a vibrant summer look, drag the Hue slider to +10
and click OK.
5. Next apply a Levels adjustment layer; click the Adjustment Layer button in the Layers
palette and choose Levels from the menu. In the Levels dialog box, tweak the levels so that
a complete tonal range is represented in the image. Drag the shadow input marker to the
right until it meets the left edge of the histogram, as in Figure 4.23. Similarly, drag the high-
light input slider toward the right until it likewise meets the right edge of the histogram and
click OK.