
Page 176 - Enhancing CAD Drawings with Photoshop
P. 176
4386.book Page 160 Monday, November 15, 2004 3:27 PM
160 CHAPTER 5 PRESENTING PLANS
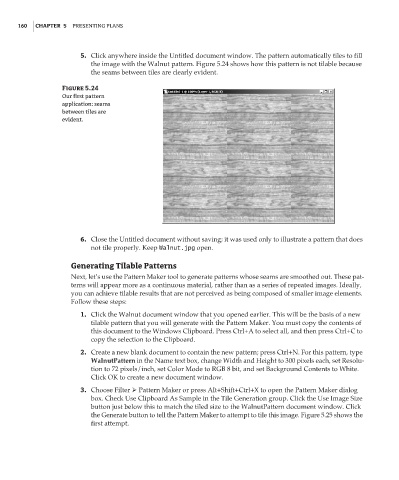
5. Click anywhere inside the Untitled document window. The pattern automatically tiles to fill
the image with the Walnut pattern. Figure 5.24 shows how this pattern is not tilable because
the seams between tiles are clearly evident.
Figure 5.24
Our first pattern
application: seams
between tiles are
evident.
6. Close the Untitled document without saving; it was used only to illustrate a pattern that does
not tile properly. Keep Walnut.jpg open.
Generating Tilable Patterns
Next, let’s use the Pattern Maker tool to generate patterns whose seams are smoothed out. These pat-
terns will appear more as a continuous material, rather than as a series of repeated images. Ideally,
you can achieve tilable results that are not perceived as being composed of smaller image elements.
Follow these steps:
1. Click the Walnut document window that you opened earlier. This will be the basis of a new
tilable pattern that you will generate with the Pattern Maker. You must copy the contents of
this document to the Windows Clipboard. Press Ctrl+A to select all, and then press Ctrl+C to
copy the selection to the Clipboard.
2. Create a new blank document to contain the new pattern; press Ctrl+N. For this pattern, type
WalnutPattern in the Name text box, change Width and Height to 300 pixels each, set Resolu-
tion to 72 pixels/inch, set Color Mode to RGB 8 bit, and set Background Contents to White.
Click OK to create a new document window.
3. Choose Filter Pattern Maker or press Alt+Shift+Ctrl+X to open the Pattern Maker dialog
box. Check Use Clipboard As Sample in the Tile Generation group. Click the Use Image Size
button just below this to match the tiled size to the WalnutPattern document window. Click
the Generate button to tell the Pattern Maker to attempt to tile this image. Figure 5.25 shows the
first attempt.