
Page 195 - Enhancing CAD Drawings with Photoshop
P. 195
4386.book Page 179 Monday, November 15, 2004 3:27 PM
LAYER STYLE TECHNIQUES 179
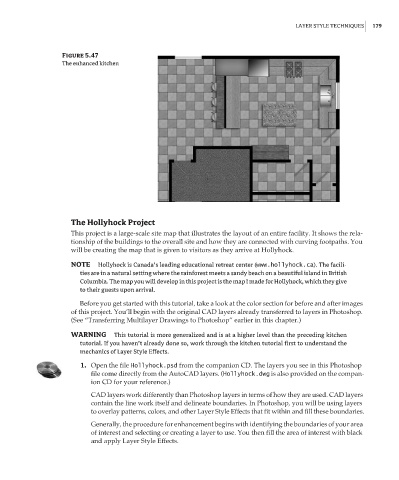
Figure 5.47
The enhanced kitchen
The Hollyhock Project
This project is a large-scale site map that illustrates the layout of an entire facility. It shows the rela-
tionship of the buildings to the overall site and how they are connected with curving footpaths. You
will be creating the map that is given to visitors as they arrive at Hollyhock.
NOTE Hollyhock is Canada’s leading educational retreat center (www.hollyhock.ca). The facili-
ties are in a natural setting where the rainforest meets a sandy beach on a beautiful island in British
Columbia. The map you will develop in this project is the map I made for Hollyhock, which they give
to their guests upon arrival.
Before you get started with this tutorial, take a look at the color section for before and after images
of this project. You’ll begin with the original CAD layers already transferred to layers in Photoshop.
(See “Transferring Multilayer Drawings to Photoshop” earlier in this chapter.)
WARNING This tutorial is more generalized and is at a higher level than the preceding kitchen
tutorial. If you haven’t already done so, work through the kitchen tutorial first to understand the
mechanics of Layer Style Effects.
1. Open the file Hollyhock.psd from the companion CD. The layers you see in this Photoshop
file come directly from the AutoCAD layers. (Hollyhock.dwg is also provided on the compan-
ion CD for your reference.)
CAD layers work differently than Photoshop layers in terms of how they are used. CAD layers
contain the line work itself and delineate boundaries. In Photoshop, you will be using layers
to overlay patterns, colors, and other Layer Style Effects that fit within and fill these boundaries.
Generally, the procedure for enhancement begins with identifying the boundaries of your area
of interest and selecting or creating a layer to use. You then fill the area of interest with black
and apply Layer Style Effects.