
Page 197 - Enhancing CAD Drawings with Photoshop
P. 197
4386.book Page 181 Monday, November 15, 2004 3:27 PM
LAYER STYLE TECHNIQUES 181
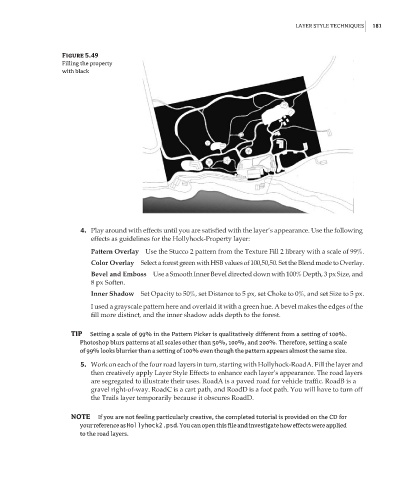
Figure 5.49
Filling the property
with black
4. Play around with effects until you are satisfied with the layer’s appearance. Use the following
effects as guidelines for the Hollyhock-Property layer:
Pattern Overlay Use the Stucco 2 pattern from the Texture Fill 2 library with a scale of 99%.
Color Overlay Select a forest green with HSB values of 100,50,50. Set the Blend mode to Overlay.
Bevel and Emboss Use a Smooth Inner Bevel directed down with 100% Depth, 3 px Size, and
8 px Soften.
Inner Shadow Set Opacity to 50%, set Distance to 5 px, set Choke to 0%, and set Size to 5 px.
I used a grayscale pattern here and overlaid it with a green hue. A bevel makes the edges of the
fill more distinct, and the inner shadow adds depth to the forest.
TIP Setting a scale of 99% in the Pattern Picker is qualitatively different from a setting of 100%.
Photoshop blurs patterns at all scales other than 50%, 100%, and 200%. Therefore, setting a scale
of 99% looks blurrier than a setting of 100% even though the pattern appears almost the same size.
5. Work on each of the four road layers in turn, starting with Hollyhock-RoadA. Fill the layer and
then creatively apply Layer Style Effects to enhance each layer’s appearance. The road layers
are segregated to illustrate their uses. RoadA is a paved road for vehicle traffic. RoadB is a
gravel right-of-way. RoadC is a cart path, and RoadD is a foot path. You will have to turn off
the Trails layer temporarily because it obscures RoadD.
NOTE If you are not feeling particularly creative, the completed tutorial is provided on the CD for
your reference as Hollyhock2.psd. You can open this file and investigate how effects were applied
to the road layers.