
Page 222 - Enhancing CAD Drawings with Photoshop
P. 222
4386.book Page 206 Monday, November 15, 2004 3:27 PM
206 CHAPTER 6 ELEVATING THE ELEVATION
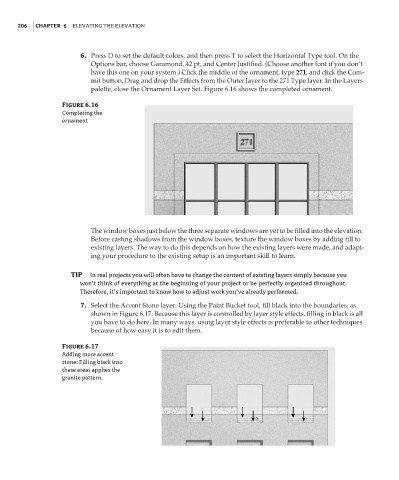
6. Press D to set the default colors, and then press T to select the Horizontal Type tool. On the
Options bar, choose Garamond, 42 pt, and Center Justified. (Choose another font if you don’t
have this one on your system.) Click the middle of the ornament, type 271, and click the Com-
mit button. Drag and drop the Effects from the Outer layer to the 271 Type layer. In the Layers
palette, close the Ornament Layer Set. Figure 6.16 shows the completed ornament.
Figure 6.16
Completing the
ornament
The window boxes just below the three separate windows are yet to be filled into the elevation.
Before casting shadows from the window boxes, texture the window boxes by adding fill to
existing layers. The way to do this depends on how the existing layers were made, and adapt-
ing your procedure to the existing setup is an important skill to learn.
TIP In real projects you will often have to change the content of existing layers simply because you
won’t think of everything at the beginning of your project or be perfectly organized throughout.
Therefore, it’s important to know how to adjust work you’ve already performed.
7. Select the Accent Stone layer. Using the Paint Bucket tool, fill black into the boundaries, as
shown in Figure 6.17. Because this layer is controlled by layer style effects, filling in black is all
you have to do here. In many ways, using layer style effects is preferable to other techniques
because of how easy it is to edit them.
Figure 6.17
Adding more accent
stone: Filling black into
these areas applies the
granite pattern.