
Page 225 - Enhancing CAD Drawings with Photoshop
P. 225
4386.book Page 209 Monday, November 15, 2004 3:27 PM
CASTING SHADOWS 209
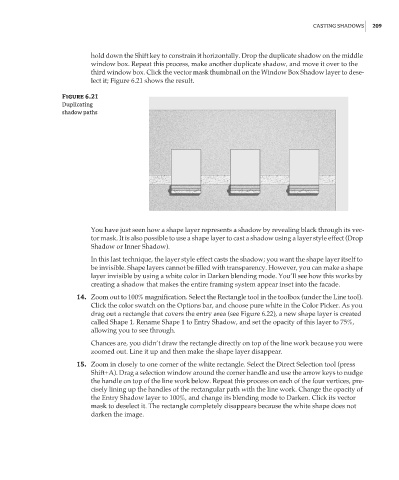
hold down the Shift key to constrain it horizontally. Drop the duplicate shadow on the middle
window box. Repeat this process, make another duplicate shadow, and move it over to the
third window box. Click the vector mask thumbnail on the Window Box Shadow layer to dese-
lect it; Figure 6.21 shows the result.
Figure 6.21
Duplicating
shadow paths
You have just seen how a shape layer represents a shadow by revealing black through its vec-
tor mask. It is also possible to use a shape layer to cast a shadow using a layer style effect (Drop
Shadow or Inner Shadow).
In this last technique, the layer style effect casts the shadow; you want the shape layer itself to
be invisible. Shape layers cannot be filled with transparency. However, you can make a shape
layer invisible by using a white color in Darken blending mode. You’ll see how this works by
creating a shadow that makes the entire framing system appear inset into the facade.
14. Zoom out to 100% magnification. Select the Rectangle tool in the toolbox (under the Line tool).
Click the color swatch on the Options bar, and choose pure white in the Color Picker. As you
drag out a rectangle that covers the entry area (see Figure 6.22), a new shape layer is created
called Shape 1. Rename Shape 1 to Entry Shadow, and set the opacity of this layer to 75%,
allowing you to see through.
Chances are, you didn’t draw the rectangle directly on top of the line work because you were
zoomed out. Line it up and then make the shape layer disappear.
15. Zoom in closely to one corner of the white rectangle. Select the Direct Selection tool (press
Shift+A). Drag a selection window around the corner handle and use the arrow keys to nudge
the handle on top of the line work below. Repeat this process on each of the four vertices, pre-
cisely lining up the handles of the rectangular path with the line work. Change the opacity of
the Entry Shadow layer to 100%, and change its blending mode to Darken. Click its vector
mask to deselect it. The rectangle completely disappears because the white shape does not
darken the image.