
Page 228 - Enhancing CAD Drawings with Photoshop
P. 228
4386.book Page 212 Monday, November 15, 2004 3:27 PM
212 CHAPTER 6 ELEVATING THE ELEVATION
5. Launch Photoshop if it is not already running. Open the file Elevation-Model2.tif from your
hard drive or from the companion CD. Press Ctrl+A and then Ctrl+C to copy the file’s entire con-
tents to the Clipboard. Once the file is on the Clipboard, you can close it without saving.
6. If you have Elevation3.psd open from the previous exercise, you can continue here; if not,
open that file in Photoshop from the companion CD before continuing.
The imported layer will contain both black and white pixels. You will use the Darken blending
mode to show only the black pixels.
TIP Alternatively, you could erase the white pixels on the CAD Linework layer with the Magic Eraser.
7. Press Ctrl+V to paste the image from the Clipboard into your Elevation project. Rename Layer 1
to CAD Linework, and drag it to the top of the Layers palette if it is not already there. Change
CAD Linework’s blending mode to Darken.
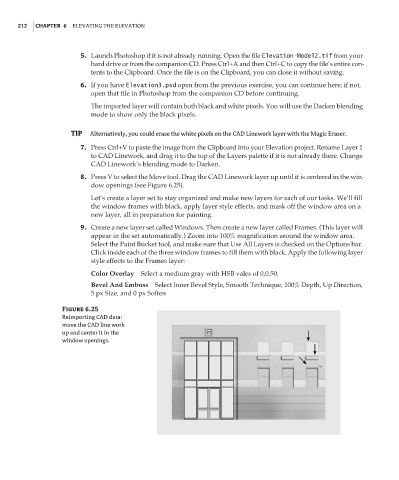
8. Press V to select the Move tool. Drag the CAD Linework layer up until it is centered in the win-
dow openings (see Figure 6.25).
Let’s create a layer set to stay organized and make new layers for each of our tasks. We’ll fill
the window frames with black, apply layer style effects, and mask off the window area on a
new layer, all in preparation for painting.
9. Create a new layer set called Windows. Then create a new layer called Frames. (This layer will
appear in the set automatically.) Zoom into 100% magnification around the window area.
Select the Paint Bucket tool, and make sure that Use All Layers is checked on the Options bar.
Click inside each of the three window frames to fill them with black. Apply the following layer
style effects to the Frames layer:
Color Overlay Select a medium gray with HSB vales of 0,0,50.
Bevel And Emboss Select Inner Bevel Style, Smooth Technique, 100% Depth, Up Direction,
5 px Size, and 0 px Soften
Figure 6.25
Reimporting CAD data:
move the CAD line work
up and center it in the
window openings.