
Page 231 - Enhancing CAD Drawings with Photoshop
P. 231
4386.book Page 215 Monday, November 15, 2004 3:27 PM
FAKING REFLECTION AND REFRACTION 215
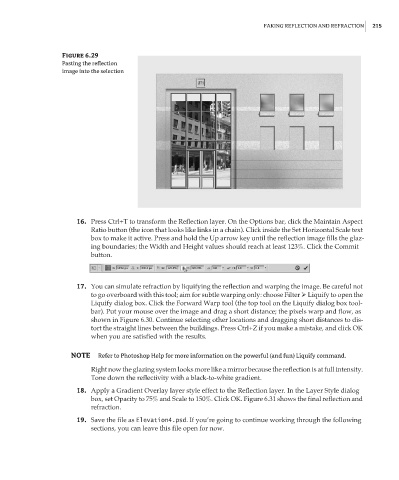
Figure 6.29
Pasting the reflection
image into the selection
16. Press Ctrl+T to transform the Reflection layer. On the Options bar, click the Maintain Aspect
Ratio button (the icon that looks like links in a chain). Click inside the Set Horizontal Scale text
box to make it active. Press and hold the Up arrow key until the reflection image fills the glaz-
ing boundaries; the Width and Height values should reach at least 123%. Click the Commit
button.
17. You can simulate refraction by liquifying the reflection and warping the image. Be careful not
to go overboard with this tool; aim for subtle warping only: choose Filter Liquify to open the
Liquify dialog box. Click the Forward Warp tool (the top tool on the Liquify dialog box tool-
bar). Put your mouse over the image and drag a short distance; the pixels warp and flow, as
shown in Figure 6.30. Continue selecting other locations and dragging short distances to dis-
tort the straight lines between the buildings. Press Ctrl+Z if you make a mistake, and click OK
when you are satisfied with the results.
NOTE Refer to Photoshop Help for more information on the powerful (and fun) Liquify command.
Right now the glazing system looks more like a mirror because the reflection is at full intensity.
Tone down the reflectivity with a black-to-white gradient.
18. Apply a Gradient Overlay layer style effect to the Reflection layer. In the Layer Style dialog
box, set Opacity to 75% and Scale to 150%. Click OK. Figure 6.31 shows the final reflection and
refraction.
19. Save the file as Elevation4.psd. If you’re going to continue working through the following
sections, you can leave this file open for now.