
Page 230 - Enhancing CAD Drawings with Photoshop
P. 230
4386.book Page 214 Monday, November 15, 2004 3:27 PM
214 CHAPTER 6 ELEVATING THE ELEVATION
Figure 6.27
Recalling a selection
from a mask
13. Open the file Sky.jpg from the companion CD. Press Ctrl+A and then Ctrl+C to select all and
copy to the Clipboard. Close Sky.jpg without saving.
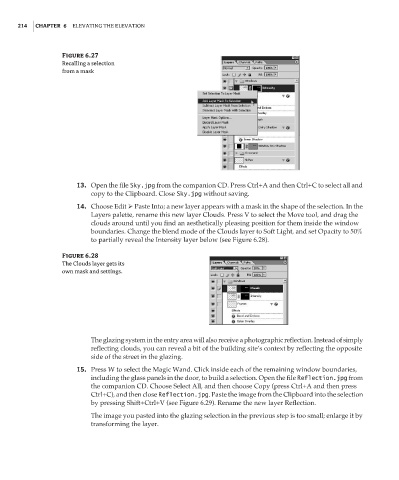
14. Choose Edit Paste Into; a new layer appears with a mask in the shape of the selection. In the
Layers palette, rename this new layer Clouds. Press V to select the Move tool, and drag the
clouds around until you find an aesthetically pleasing position for them inside the window
boundaries. Change the blend mode of the Clouds layer to Soft Light, and set Opacity to 50%
to partially reveal the Intensity layer below (see Figure 6.28).
Figure 6.28
The Clouds layer gets its
own mask and settings.
The glazing system in the entry area will also receive a photographic reflection. Instead of simply
reflecting clouds, you can reveal a bit of the building site’s context by reflecting the opposite
side of the street in the glazing.
15. Press W to select the Magic Wand. Click inside each of the remaining window boundaries,
including the glass panels in the door, to build a selection. Open the file Reflection.jpg from
the companion CD. Choose Select All, and then choose Copy (press Ctrl+A and then press
Ctrl+C), and then close Reflection.jpg. Paste the image from the Clipboard into the selection
by pressing Shift+Ctrl+V (see Figure 6.29). Rename the new layer Reflection.
The image you pasted into the glazing selection in the previous step is too small; enlarge it by
transforming the layer.