
Page 241 - Enhancing CAD Drawings with Photoshop
P. 241
4386.book Page 225 Monday, November 15, 2004 3:27 PM
RENDERING IN AUTODESK VIZ 225
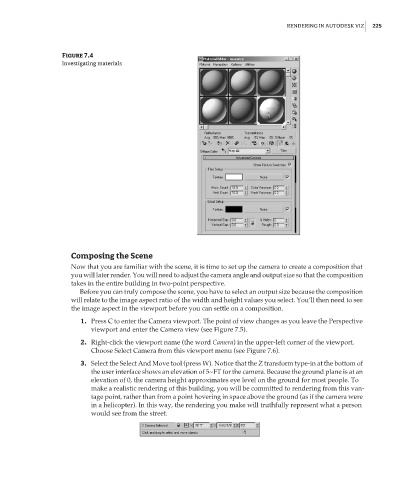
Figure 7.4
Investigating materials
Composing the Scene
Now that you are familiar with the scene, it is time to set up the camera to create a composition that
you will later render. You will need to adjust the camera angle and output size so that the composition
takes in the entire building in two-point perspective.
Before you can truly compose the scene, you have to select an output size because the composition
will relate to the image aspect ratio of the width and height values you select. You’ll then need to see
the image aspect in the viewport before you can settle on a composition.
1. Press C to enter the Camera viewport. The point of view changes as you leave the Perspective
viewport and enter the Camera view (see Figure 7.5).
2. Right-click the viewport name (the word Camera) in the upper-left corner of the viewport.
Choose Select Camera from this viewport menu (see Figure 7.6).
3. Select the Select And Move tool (press W). Notice that the Z transform type-in at the bottom of
the user interface shows an elevation of 5~FT for the camera. Because the ground plane is at an
elevation of 0, the camera height approximates eye level on the ground for most people. To
make a realistic rendering of this building, you will be committed to rendering from this van-
tage point, rather than from a point hovering in space above the ground (as if the camera were
in a helicopter). In this way, the rendering you make will truthfully represent what a person
would see from the street.