
Page 246 - Enhancing CAD Drawings with Photoshop
P. 246
4386.book Page 230 Monday, November 15, 2004 3:27 PM
230 CHAPTER 7 CREATIVE COMPOSITING
Matte objects are invisible in any rendering, but they magically block geometry behind them.
Therefore, matte objects are at the root of the solution to the 3D obscuration problem in a 2D render-
ing. In VIZ, you assign matte objects by applying the Matte/Shadow material to selected objects.
NOTE Optionally, you can set matte objects to cast and/or receive shadows, even though they are
invisible.
To preserve the boundaries of each rendered object for later compositing in Photoshop, you use
alpha channels. (See Chapter 4, “You and Your Entourage,” for more information on alpha channels.)
Alpha channels are automatically calculated in every VIZ rendering, but they can only be stored on
disk (and therefore transferred to Photoshop) in a few file formats, including .psd, .tif, and .tga.
We will use the Targa format (*.tga) in this chapter to store alpha channels. Targa images also fea-
ture optional compression for small file sizes. One peculiarity of VIZ is the requirement that the back-
ground be black to properly store anti-aliased object boundaries in the alpha channel; otherwise, a
fringe of environment color can appear around the objects.
A black environment is not a problem because we will be compositing the background image in
Photoshop, covering the black areas entirely. Let’s set the environment color and then dive into the
object-rendering work flow:
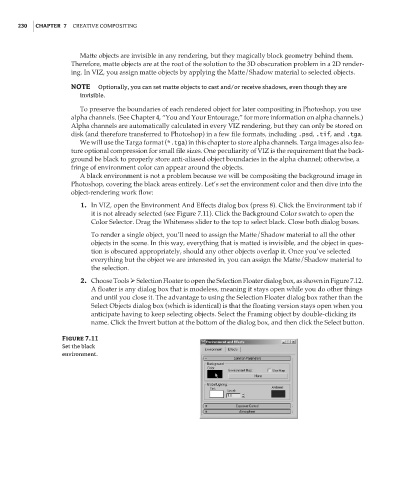
1. In VIZ, open the Environment And Effects dialog box (press 8). Click the Environment tab if
it is not already selected (see Figure 7.11). Click the Background Color swatch to open the
Color Selector. Drag the Whiteness slider to the top to select black. Close both dialog boxes.
To render a single object, you’ll need to assign the Matte/Shadow material to all the other
objects in the scene. In this way, everything that is matted is invisible, and the object in ques-
tion is obscured appropriately, should any other objects overlap it. Once you’ve selected
everything but the object we are interested in, you can assign the Matte/Shadow material to
the selection.
2. Choose Tools Selection Floater to open the Selection Floater dialog box, as shown in Figure 7.12.
A floater is any dialog box that is modeless, meaning it stays open while you do other things
and until you close it. The advantage to using the Selection Floater dialog box rather than the
Select Objects dialog box (which is identical) is that the floating version stays open when you
anticipate having to keep selecting objects. Select the Framing object by double-clicking its
name. Click the Invert button at the bottom of the dialog box, and then click the Select button.
Figure 7.11
Set the black
environment.