Page 276 - Failure Analysis Case Studies II
P. 276
26 1

          factor must be included to account for the stress riser caused by the abrupt change in pin diameters.
          Multiplying thc  bend  stress by  the  elastic stress concentration  factor  (K, = 1.67) produces  a
          maximum bending stress of approximately 443 MPa. This value is greater than the ultimate stress
          of 324 MPa as calculated from the hardness test and equation (1). Even though the maximum
          bend stress is greater than the ultimate stress, the pin will not necessarily fail under this loading
          scenario. As the material along the top surface of the pin is plastically deformed, the stress level
          remains relatively constant and additional loads are redistributed toward the center of the pin.
          After the pin has undergone plastic deformation, the elastic beam equation for the bend stress is
          no longer valid. Once this happens, an inelastic bending analysis must be performed. The important
          point  to  note from  this analysis is' that under  the maximum  loading scenario, the pin  will  be
          plastically deformed. This fact alone indicates that the pin was poorly designed.


          2.4. Fatigue stress concentration

            Close examination of  the fracture surfaces has indicated a fatigue failure. The elastic stress
          concentration  factor previously determined is measured under conditions of  elastic stress and
          cannot be directly applied in fatigue calculations. Experiments have shown that the fatigue stress
          concentration factor may differ significantly from the elastic stress concentration factor. From the
          microscopic viewpoint, the steep gradients of an elastic stress field may not be sufficient to shuttle
          dislocations and nucleate a fatigue crack. Hence, considerable experimental evidence has shown
          that the fatigue stress concentration (K,) is less than or equal to the elastic stress concentration
          (K,). The elastic concentration factor can be converted to a fatigue stress concentration factor by
          the following formula [4],


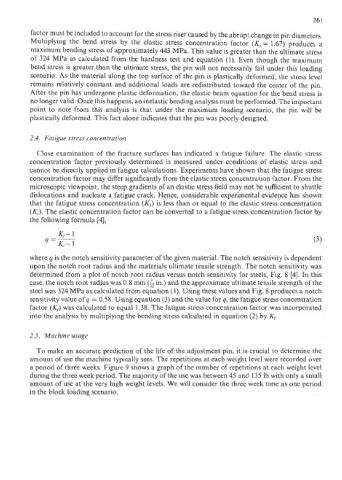
          where q is the notch sensitivity parameter of the given material. The notch sensitivity is dependent
          upon the notch root radius and the materials ultimate tensile strength. The notch sensitivity was
          determined from a plot of notch root radius versus notch sensitivity for steels, Fig. 8 [4]. In this
          case. the notch root radius was 0.8 mm (& in.) and the approximate ultimate tensile strength of the
          steel was 324 MPa as calculated from equation (1). Using these values and Fig. 8 produces a notch
          sensitivity value of y = 0.58. Using equation (3) and the value for q, the fatigue stress concentration
          factor (K,) was calculated to equal 1.38. The fatigue stress concentration factor was incorporated
          into the analysis by multiplying the bending stress calculated in equation (2) by Kr.


          2.5. Machine usage

             To make an accurate prediction of  the life of the adjustment pin, it is crucial to determine the
          amount of use the machine typically sees. The repetitions at each weight level were recorded over
           a period of three weeks. Figure 9 shows a graph of the number of repetitions at each weight level
          during the three week period. The majority of the use was between 45 and 135 Ib with only a small
          amount of use at the very high weight levels. We will consider the three week time as one period
          in the block loading scenario.

