
Page 134 - Mastering SolidWorks
P. 134
|
tUtoriaL: USing BLockS and BeLtS 103
3. Exit the sketch by clicking the Confirmation Corner Exit Sketch symbol in the upper-right
corner of the graphics window (not the red X).
4. Open a second sketch on the Front plane and draw a circle with a 6-inch diameter
centered on the origin. This needs to be a second sketch, not just reopening the first sketch.
5. Inside the circle, draw a Centerpoint rectangle centered on the origin.
6. Select two adjacent sides of the rectangle and make an Equal sketch relation between
them. This makes the rectangle into a square, but still doesn’t define its size.
7. Click the Smart Dimension tool and apply a 1.000-inch dimension to one side of the
square. Turn off the Smart Dimension tool by clicking it again on the toolbar or
pressing Esc.
8. If the Blocks toolbar is not active, activate it and then select Make Block. You also can
access this command through Tools ➢ Block ➢ Make.
9. Window select the circle and the square by clicking and dragging a box that includes all
the items in the sketch. The PropertyManager to the left displays a circle and six lines that
are to be made into a block. SolidWorks by default forces you into using the Lasso
selection. You can switch to Box selection in the Tools menu, or in Tools ➢ Options ➢
Selection, Box. This would be a good tool to put on a hotkey.
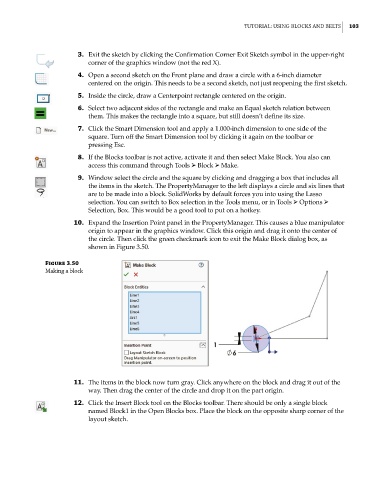
10. Expand the Insertion Point panel in the PropertyManager. This causes a blue manipulator
origin to appear in the graphics window. Click this origin and drag it onto the center of
the circle. Then click the green checkmark icon to exit the Make Block dialog box, as
shown in Figure 3.50.
Figure 3.50
making a block
11. The items in the block now turn gray. Click anywhere on the block and drag it out of the
way. Then drag the center of the circle and drop it on the part origin.
12. Click the Insert Block tool on the Blocks toolbar. There should be only a single block
named Block1 in the Open Blocks box. Place the block on the opposite sharp corner of the
layout sketch.