
Page 240 - Mastering SolidWorks
P. 240
|
tutorial: uSinG MetaData 211
18. Select the flat face on the other side of the part from where you just extruded the text, and
open a sketch.
19. Select the face and click the Offset button to make a set of sketch entities offset to the
inside of the face by .50 inches. Remember that you may have to reverse the offset to get it
to work properly.
20. Open the Line Format toolbar (right-click any toolbar other than the CommandManager
and select Line Format).
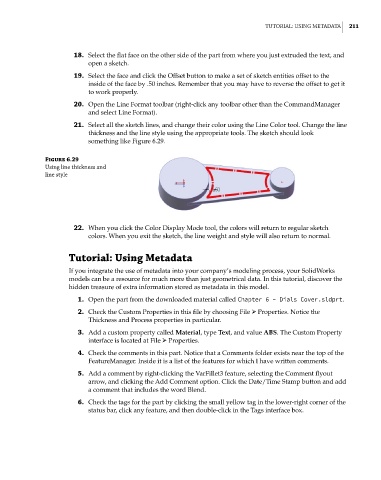
21. Select all the sketch lines, and change their color using the Line Color tool. Change the line
thickness and the line style using the appropriate tools. The sketch should look
something like Figure 6.29.
Figure 6.29
using line thickness and
line style
22. When you click the Color Display Mode tool, the colors will return to regular sketch
colors. When you exit the sketch, the line weight and style will also return to normal.
Tutorial: Using Metadata
If you integrate the use of metadata into your company’s modeling process, your SolidWorks
models can be a resource for much more than just geometrical data. In this tutorial, discover the
hidden treasure of extra information stored as metadata in this model.
1. Open the part from the downloaded material called Chapter 6 – Dials Cover.sldprt.
2. Check the Custom Properties in this file by choosing File ➢ Properties. Notice the
Thickness and Process properties in particular.
3. Add a custom property called Material, type Text, and value ABS. The Custom Property
interface is located at File ➢ Properties.
4. Check the comments in this part. Notice that a Comments folder exists near the top of the
FeatureManager. Inside it is a list of the features for which I have written comments.
5. Add a comment by right-clicking the VarFillet3 feature, selecting the Comment flyout
arrow, and clicking the Add Comment option. Click the Date/Time Stamp button and add
a comment that includes the word Blend.
6. Check the tags for the part by clicking the small yellow tag in the lower-right corner of the
status bar, click any feature, and then double-click in the Tags interface box.