
Page 112 - Robot Builder's Bonanza
P. 112
MAKING THE BASE 81
Table 8-1 PlyBot Parts List
Robot Base:
1 5″ 7″ 5- ply 1/4″-thick birch plywood*
2 Tamiya Worm Gear kit, model 72004†
1 Tamiya Narrow Tires (pair), 58mm diameter, model 70145†
1 11/16″ diameter ball transfer (i.e., ball caster), McMaster- Carr, item #5674K57‡
6 Assembly hardware: 4-40 1/2″ machine screws, 4-40 nuts
* Birch plywood is available at hobby and craft stores. Look for 1/4″-thick aircraft- grade plywood.
† Tamiya motors and wheels are available at most online hobby stores, such as Tower Hobbies, as well as many robotics
specialty sites.
‡ You may substitute most any ball caster with a 1″ to 1.5″ flange- to- wheel depth. There is nothing special about this
particular caster, so feel free to substitute if you want to use something else.
you can substitute another for it if you like, as long as it’s about the same size. Your caster
should have a flange- to- ball depth of about 1″ to 1.5″.
CUTTING AND DRILLING
Begin construction by cutting the wood to 5″ 7″. Then, using Figure 8-2 as a guide, cut the
sides of the wood to create a narrowing shape. The finished base should look like Figure 8-3.
Once the base is cut, use a sander or small rasp to round off the four corners. This is not
mandatory, but it makes for a nicer overall shape and appearance. You should also apply a
light sanding to the base now, to remove any rough edges caused by cutting. If you wish, you
may apply a coat of sealant or varnish to close the pores of the wood. This will prevent it from
absorbing moisture, which could cause warping.
Consult the drilling template in Figure 8-4. Use a 1/8″ drill bit for all holes. The location
of the holes are not supercritical except for the distance between the two holes for each of the
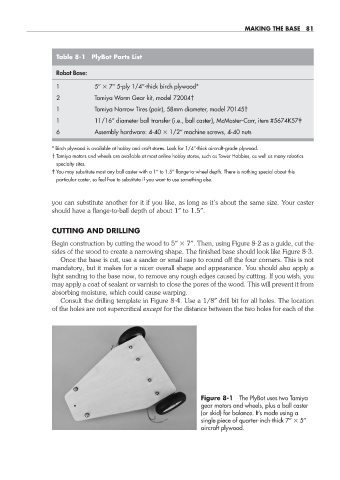
Figure 8-1 The PlyBot uses two Tamiya
gear motors and wheels, plus a ball caster
(or skid) for balance. It’s made using a
single piece of quarter- inch- thick 7″ 5″
aircraft plywood.
08-chapter-8.indd 81 4/21/11 11:44 AM