
Page 115 - 15 Dangerously Mad Projects for the Evil Genius
P. 115
94 15 Dangerously Mad Projects for the Evil Genius
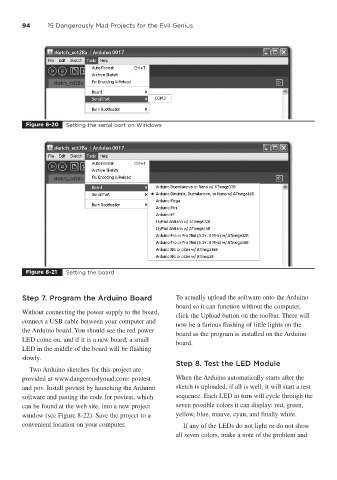
Figure 8-20 Setting the serial port on Windows
Figure 8-21 Setting the board
Step 7. Program the Arduino Board To actually upload the software onto the Arduino
board so it can function without the computer,
Without connecting the power supply to the board,
click the Upload button on the toolbar. There will
connect a USB cable between your computer and
now be a furious flashing of little lights on the
the Arduino board. You should see the red power
board as the program is installed on the Arduino
LED come on, and if it is a new board, a small
board.
LED in the middle of the board will be flashing
slowly.
Step 8. Test the LED Module
Two Arduino sketches for this project are
provided at www.dangerouslymad.com: povtest When the Arduino automatically starts after the
and pov. Install povtest by launching the Arduino sketch is uploaded, if all is well, it will start a test
software and pasting the code for povtest, which sequence. Each LED in turn will cycle through the
can be found at the web site, into a new project seven possible colors it can display: red, green,
window (see Figure 8-22). Save the project to a yellow, blue, mauve, cyan, and finally white.
convenient location on your computer. If any of the LEDs do not light or do not show
all seven colors, make a note of the problem and