
Page 117 - 15 Dangerously Mad Projects for the Evil Genius
P. 117
96 15 Dangerously Mad Projects for the Evil Genius
Apart from attaching the assembly to a motor,
which we will deal with in the next section, that’s
about it for the LED assembly.
Motor Controller
We need to be able to control the speed of the
motor, because it must match the speed at which
the LEDs switch from displaying one column to
the next. There is no sensor to automatically
synchronize the LEDs with the spinning motor. It’s
actually more fun without this, as the letters can be
Figure 8-23 The battery clip for the LED unit
made to process around the display by tweaking
the motor’s speed.
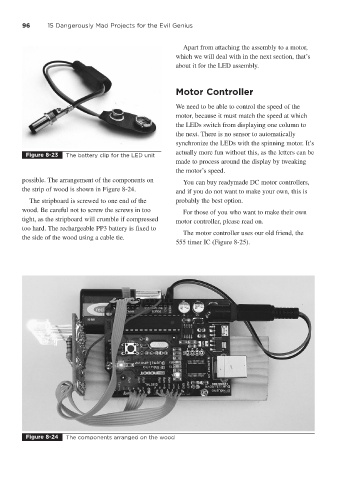
possible. The arrangement of the components on You can buy readymade DC motor controllers,
the strip of wood is shown in Figure 8-24. and if you do not want to make your own, this is
The stripboard is screwed to one end of the probably the best option.
wood. Be careful not to screw the screws in too For those of you who want to make their own
tight, as the stripboard will crumble if compressed motor controller, please read on.
too hard. The rechargeable PP3 battery is fixed to
The motor controller uses our old friend, the
the side of the wood using a cable tie.
555 timer IC (Figure 8-25).
Figure 8-24 The components arranged on the wood