
Page 217 - 15 Dangerously Mad Projects for the Evil Genius
P. 217
Chapter 15 ■ Surveillance Robot 193
Step 1. Disassemble the Screwdrivers
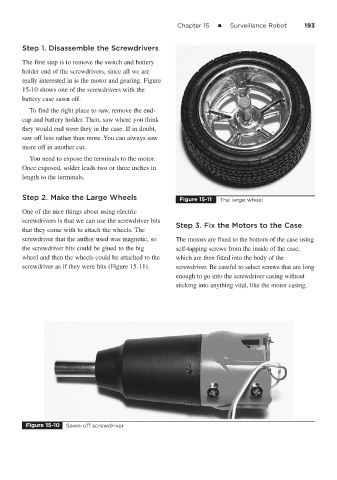
The first step is to remove the switch and battery
holder end of the screwdrivers, since all we are
really interested in is the motor and gearing. Figure
15-10 shows one of the screwdrivers with the
battery case sawn off.
To find the right place to saw, remove the end-
cap and battery holder. Then, saw where you think
they would end were they in the case. If in doubt,
saw off less rather than more. You can always saw
more off in another cut.
You need to expose the terminals to the motor.
Once exposed, solder leads two or three inches in
length to the terminals.
Step 2. Make the Large Wheels Figure 15-11 The large wheel
One of the nice things about using electric
screwdrivers is that we can use the screwdriver bits
Step 3. Fix the Motors to the Case
that they come with to attach the wheels. The
screwdriver that the author used was magnetic, so The motors are fixed to the bottom of the case using
the screwdriver bits could be glued to the big self-tapping screws from the inside of the case,
wheel and then the wheels could be attached to the which are then fitted into the body of the
screwdriver as if they were bits (Figure 15-11). screwdriver. Be careful to select screws that are long
enough to go into the screwdriver casing without
sticking into anything vital, like the motor casing.
Figure 15-10 Sawn-off screwdriver