
Page 101 - Amphibionics : Build Your Own Biologically Inspired Robot
P. 101
Amphibionics 04 3/24/03 8:23 AM Page 80
Amphibionics
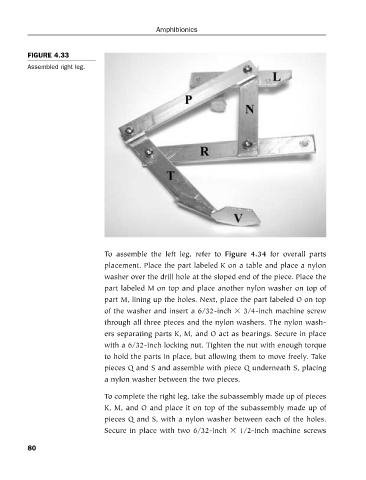
FIGURE 4.33
Assembled right leg.
To assemble the left leg, refer to Figure 4.34 for overall parts
placement. Place the part labeled K on a table and place a nylon
washer over the drill hole at the sloped end of the piece. Place the
part labeled M on top and place another nylon washer on top of
part M, lining up the holes. Next, place the part labeled O on top
of the washer and insert a 6/32-inch 3/4-inch machine screw
through all three pieces and the nylon washers. The nylon wash-
ers separating parts K, M, and O act as bearings. Secure in place
with a 6/32-inch locking nut. Tighten the nut with enough torque
to hold the parts in place, but allowing them to move freely. Take
pieces Q and S and assemble with piece Q underneath S, placing
a nylon washer between the two pieces.
To complete the right leg, take the subassembly made up of pieces
K, M, and O and place it on top of the subassembly made up of
pieces Q and S, with a nylon washer between each of the holes.
Secure in place with two 6/32-inch 1/2-inch machine screws
80