
Page 103 - Amphibionics : Build Your Own Biologically Inspired Robot
P. 103
Amphibionics 04 3/24/03 8:23 AM Page 82
Amphibionics
and locking nuts. Tighten the nuts with enough torque to hold the
parts in place, but allowing them to move freely. The left leg is
identical to the right leg, with the only difference being that the
parts placement is a mirror of the right leg.
Attaching the Legs to the Robot’s Body
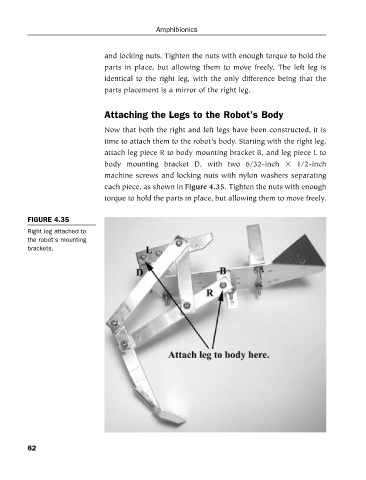
Now that both the right and left legs have been constructed, it is
time to attach them to the robot’s body. Starting with the right leg,
attach leg piece R to body mounting bracket B, and leg piece L to
body mounting bracket D, with two 6/32-inch 1/2-inch
machine screws and locking nuts with nylon washers separating
each piece, as shown in Figure 4.35. Tighten the nuts with enough
torque to hold the parts in place, but allowing them to move freely.
FIGURE 4.35
Right leg attached to
the robot’s mounting
brackets.
82