
Page 358 - 02. Subyek Computer Aided Design - Beginner’s Guide to SOLIDWORKS 2019- Level 1 by Alejandro Reyes
P. 358
Detail Drawing
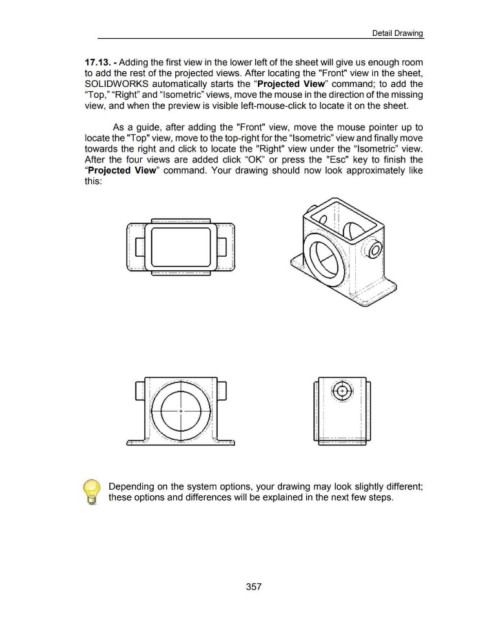
17 .13. -Adding the first view in the lower left of the sheet will give us enough room
to add the rest of the projected views. After locating the "Front" view in the sheet,
SOLIDWORKS automatically starts the "Projected View" command; to add the
"Top," "Right" and "Isometric" views, move the mouse in the direction of the missing
view, and when the preview is visible left-mouse-click to locate it on the sheet.
As a guide, after adding the "Front" view, move the mouse pointer up to
locate the "Top" view, move to the top-right for the "Isometric" view and finally move
towards the right and click to locate the "Right" view under the "Isometric" view.
After the four views are added click "OK" or press the "Esc" key to finish the
"Projected View" command. Your drawing should now look approximately like
this:
1---------
r -- ~ l" - - .t.;
I
I
I I
I
I I I I
I I I I I I
J I
I 1
I I
L--~ i __ J
---------t
I I
I
I I
I I I I
I I
I I
I I I I
: i I :
I I
I I I : I
I
I I
1 Depending on the system options, your drawing may look slightly different;
these options and differences will be explained in the next few steps.
357