
Page 95 - Build a Remote Controlled Robot
P. 95
62
CHAPTER FOUR
COMPLETING THE MOTHERBOARD
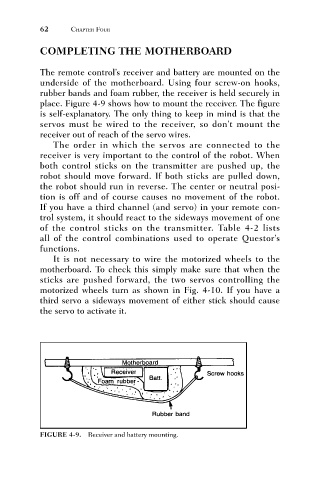
The remote control’s receiver and battery are mounted on the
underside of the motherboard. Using four screw-on hooks,
rubber bands and foam rubber, the receiver is held securely in
place. Figure 4-9 shows how to mount the receiver. The figure
is self-explanatory. The only thing to keep in mind is that the
servos must be wired to the receiver, so don’t mount the
receiver out of reach of the servo wires.
The order in which the servos are connected to the
receiver is very important to the control of the robot. When
both control sticks on the transmitter are pushed up, the
robot should move forward. If both sticks are pulled down,
the robot should run in reverse. The center or neutral posi-
tion is off and of course causes no movement of the robot.
If you have a third channel (and servo) in your remote con-
trol system, it should react to the sideways movement of one
of the control sticks on the transmitter. Table 4-2 lists
all of the control combinations used to operate Questor’s
functions.
It is not necessary to wire the motorized wheels to the
motherboard. To check this simply make sure that when the
sticks are pushed forward, the two servos controlling the
motorized wheels turn as shown in Fig. 4-10. If you have a
third servo a sideways movement of either stick should cause
the servo to activate it.
FIGURE 4-9. Receiver and battery mounting.