
Page 110 - Enhancing CAD Drawings with Photoshop
P. 110
4386.book Page 93 Monday, November 15, 2004 3:27 PM
SHARPENING AND BLURRING 93
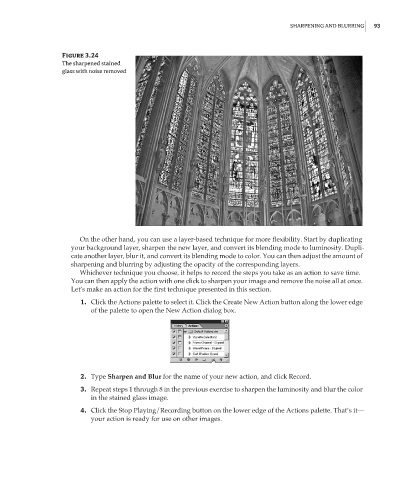
Figure 3.24
The sharpened stained
glass with noise removed
On the other hand, you can use a layer-based technique for more flexibility. Start by duplicating
your background layer, sharpen the new layer, and convert its blending mode to luminosity. Dupli-
cate another layer, blur it, and convert its blending mode to color. You can then adjust the amount of
sharpening and blurring by adjusting the opacity of the corresponding layers.
Whichever technique you choose, it helps to record the steps you take as an action to save time.
You can then apply the action with one click to sharpen your image and remove the noise all at once.
Let’s make an action for the first technique presented in this section.
1. Click the Actions palette to select it. Click the Create New Action button along the lower edge
of the palette to open the New Action dialog box.
2. Type Sharpen and Blur for the name of your new action, and click Record.
3. Repeat steps 1 through 8 in the previous exercise to sharpen the luminosity and blur the color
in the stained glass image.
4. Click the Stop Playing/Recording button on the lower edge of the Actions palette. That’s it—
your action is ready for use on other images.