
Page 106 - Enhancing CAD Drawings with Photoshop
P. 106
4386.book Page 89 Monday, November 15, 2004 3:27 PM
REPLACING THE SKY 89
3. Click a point on the left side of the sky in the document window. The preview image in the
Color Range dialog box shows some of the sky selected in white.
4. Click the Add To Sample eyedropper tool in the Color Range dialog box. This allows you to
add colors to your range. Click a point on the right side of the sky in the document window.
More of the sky should appear in white within the Color Range dialog box.
5. Drag the Fuzziness slider to the right until the entire sky area shows in white within the Color
Range dialog box. A setting of 125 is about right for this image. Click OK.
6. The marching ants appear in the documents window showing what has been selected. Not
only is the entire sky selected, but portions of the house that have a similar paint color com-
pared to the sky are selected. Choose the Lasso tool in the toolbox, or press L.
7. On the options bar, click the Subtract From Selection button . Lasso all the marching ants
that appear on the house itself, being careful not to deselect any of the sky. Now only the sky
is selected.
8. Choose Select Feather to soften the edge of the selection. Set the Feather Radius to 1 pixel,
and click OK in the small dialog box that appears.
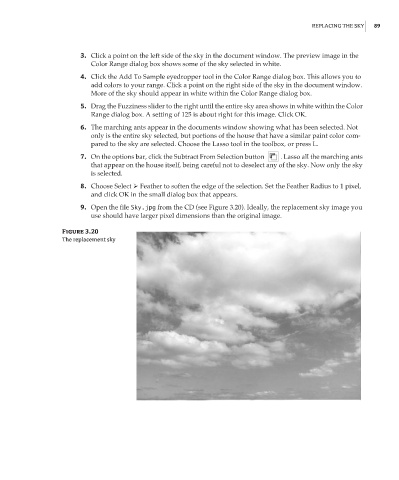
9. Open the file Sky.jpg from the CD (see Figure 3.20). Ideally, the replacement sky image you
use should have larger pixel dimensions than the original image.
Figure 3.20
The replacement sky