
Page 101 - Enhancing CAD Drawings with Photoshop
P. 101
4386.book Page 84 Monday, November 15, 2004 3:27 PM
84 CHAPTER 3 DIGITAL DARKROOM SKILLS
6. Double-click the Set White Point eyedropper and set the RGB values to 235. This is a bit darker
than pure white so that you’ll avoid washout when you map the colors of your image to this
value in subsequent steps.
7. Click OK to close the Color Picker, and then click OK to close the Curves dialog box. A small
dialog box asks, “Save the new target colors as defaults?” Click Yes. You won’t have to repeat
steps 3 through 6 in the future. So far you have set up the target values to which you want to
map colors, but you haven’t yet selected the corresponding colors in your image.
8. Apply a Threshold adjustment layer (see Figure 3.14). Threshold displays high-contrast black-
and-white images; all pixels darker than the threshold are converted to black, and all pixels
whiter than the threshold are converted to white. Moving the slider helps determine which are
the very darkest and brightest areas of your image.
Figure 3.14
The Threshold
adjustment layer
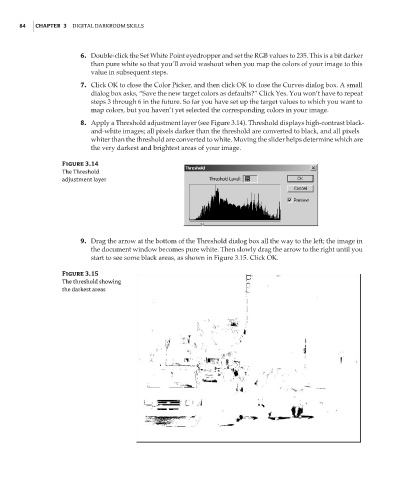
9. Drag the arrow at the bottom of the Threshold dialog box all the way to the left; the image in
the document window becomes pure white. Then slowly drag the arrow to the right until you
start to see some black areas, as shown in Figure 3.15. Click OK.
Figure 3.15
The threshold showing
the darkest areas