
Page 103 - Enhancing CAD Drawings with Photoshop
P. 103
4386.book Page 86 Monday, November 15, 2004 3:27 PM
86 CHAPTER 3 DIGITAL DARKROOM SKILLS
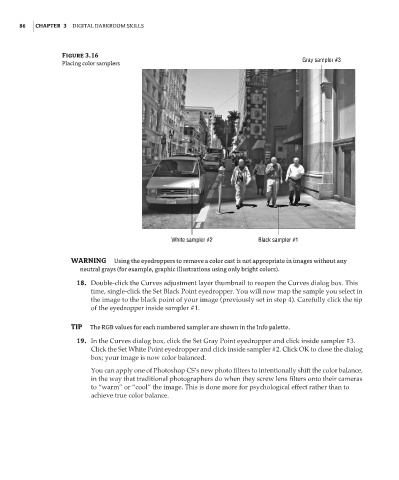
Figure 3.16
Gray sampler #3
Placing color samplers
White sampler #2 Black sampler #1
WARNING Using the eyedroppers to remove a color cast is not appropriate in images without any
neutral grays (for example, graphic illustrations using only bright colors).
18. Double-click the Curves adjustment layer thumbnail to reopen the Curves dialog box. This
time, single-click the Set Black Point eyedropper. You will now map the sample you select in
the image to the black point of your image (previously set in step 4). Carefully click the tip
of the eyedropper inside sampler #1.
TIP The RGB values for each numbered sampler are shown in the Info palette.
19. In the Curves dialog box, click the Set Gray Point eyedropper and click inside sampler #3.
Click the Set White Point eyedropper and click inside sampler #2. Click OK to close the dialog
box; your image is now color balanced.
You can apply one of Photoshop CS’s new photo filters to intentionally shift the color balance,
in the way that traditional photographers do when they screw lens filters onto their cameras
to “warm” or “cool” the image. This is done more for psychological effect rather than to
achieve true color balance.