
Page 143 - Enhancing CAD Drawings with Photoshop
P. 143
4386.book Page 126 Monday, November 15, 2004 3:27 PM
126 CHAPTER 4 YOU AND YOUR ENTOURAGE
The bottom of the woman’s toes snap just above the ground line; Photoshop automatically aligns
layers based on their edges. Because this elevation is an orthographic projection, the woman’s
shoes look a little strange; they were taken with a camera and are in perspective. To hide this
mismatch, press the Down arrow key three times to move her slightly lower. Now her toes are
cropped, and the figure looks better in the elevation because the perspective cues are less pro-
nounced. Click the Commit button on the Options bar to complete the Transform command.
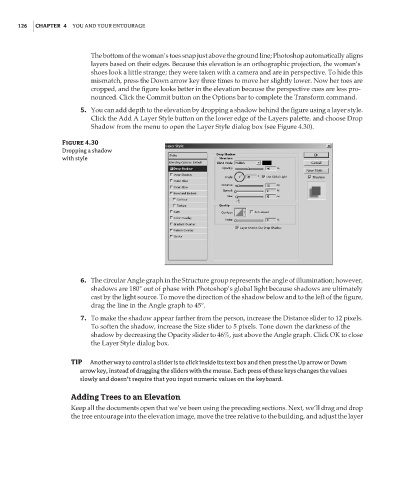
5. You can add depth to the elevation by dropping a shadow behind the figure using a layer style.
Click the Add A Layer Style button on the lower edge of the Layers palette, and choose Drop
Shadow from the menu to open the Layer Style dialog box (see Figure 4.30).
Figure 4.30
Dropping a shadow
with style
6. The circular Angle graph in the Structure group represents the angle of illumination; however,
shadows are 180° out of phase with Photoshop’s global light because shadows are ultimately
cast by the light source. To move the direction of the shadow below and to the left of the figure,
drag the line in the Angle graph to 45°.
7. To make the shadow appear farther from the person, increase the Distance slider to 12 pixels.
To soften the shadow, increase the Size slider to 5 pixels. Tone down the darkness of the
shadow by decreasing the Opacity slider to 46%, just above the Angle graph. Click OK to close
the Layer Style dialog box.
TIP Another way to control a slider is to click inside its text box and then press the Up arrow or Down
arrow key, instead of dragging the sliders with the mouse. Each press of these keys changes the values
slowly and doesn’t require that you input numeric values on the keyboard.
Adding Trees to an Elevation
Keep all the documents open that we’ve been using the preceding sections. Next, we’ll drag and drop
the tree entourage into the elevation image, move the tree relative to the building, and adjust the layer