
Page 144 - Enhancing CAD Drawings with Photoshop
P. 144
4386.book Page 127 Monday, November 15, 2004 3:27 PM
ENHANCING ENTOURAGE 127
stacking order to control the visibility of entourage in the composition. And I’ll even show you how
to add a tree to your scene without showing a tree at all!
1. Click the title bar of the PlumTreeEntourage.psd document window. This file uses Hue/Sat-
uration and Levels adjustment layers (see the previous section for the rationale), as shown in
Figure 4.31. You will have to create a Composite layer above the adjustment layers if you want
to take the adjusted entourage with you into the elevation.
Figure 4.31
The layers in
PlumTreeEntourage.psd
2. Click the Levels 1 layer to select the top layer in the palette. Then press Shift+Ctrl+N to create
a new layer. Rename the new layer Tree. Press Alt+Shift+Ctrl+E to stamp all the visible layers
onto the Tree layer.
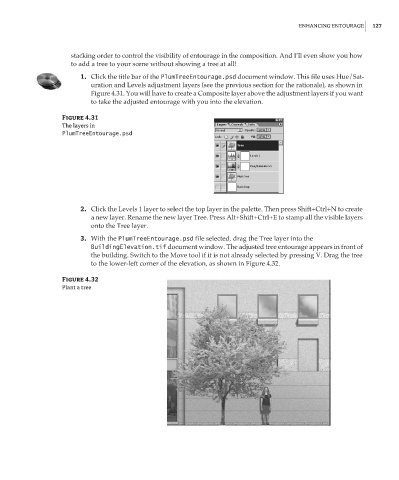
3. With the PlumTreeEntourage.psd file selected, drag the Tree layer into the
BuildingElevation.tif document window. The adjusted tree entourage appears in front of
the building. Switch to the Move tool if it is not already selected by pressing V. Drag the tree
to the lower-left corner of the elevation, as shown in Figure 4.32.
Figure 4.32
Plant a tree