
Page 163 - Enhancing CAD Drawings with Photoshop
P. 163
4386.book Page 147 Monday, November 15, 2004 3:27 PM
PREPARING PLANS IN AUTOCAD 147
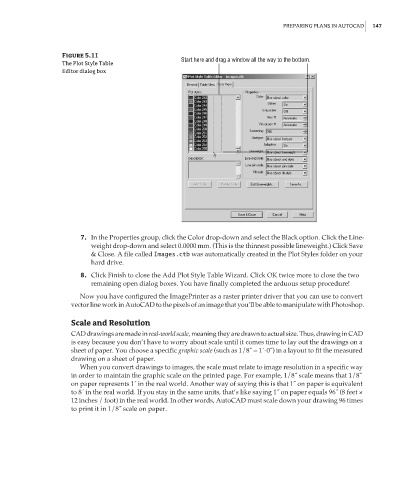
Figure 5.11
Start here and drag a window all the way to the bottom.
The Plot Style Table
Editor dialog box
7. In the Properties group, click the Color drop-down and select the Black option. Click the Line-
weight drop-down and select 0.0000 mm. (This is the thinnest possible lineweight.) Click Save
& Close. A file called Images.ctb was automatically created in the Plot Styles folder on your
hard drive.
8. Click Finish to close the Add Plot Style Table Wizard. Click OK twice more to close the two
remaining open dialog boxes. You have finally completed the arduous setup procedure!
Now you have configured the ImagePrinter as a raster printer driver that you can use to convert
vector line work in AutoCAD to the pixels of an image that you’ll be able to manipulate with Photoshop.
Scale and Resolution
CAD drawings are made in real-world scale, meaning they are drawn to actual size. Thus, drawing in CAD
is easy because you don’t have to worry about scale until it comes time to lay out the drawings on a
sheet of paper. You choose a specific graphic scale (such as 1/8˝ = 1´-0˝) in a layout to fit the measured
drawing on a sheet of paper.
When you convert drawings to images, the scale must relate to image resolution in a specific way
in order to maintain the graphic scale on the printed page. For example, 1/8˝ scale means that 1/8˝
on paper represents 1´ in the real world. Another way of saying this is that 1˝ on paper is equivalent
to 8´ in the real world. If you stay in the same units, that’s like saying 1˝ on paper equals 96˝ (8 feet ×
12 inches / foot) in the real world. In other words, AutoCAD must scale down your drawing 96 times
to print it in 1/8˝ scale on paper.