
Page 167 - Enhancing CAD Drawings with Photoshop
P. 167
4386.book Page 151 Monday, November 15, 2004 3:27 PM
PREPARING PLANS IN AUTOCAD 151
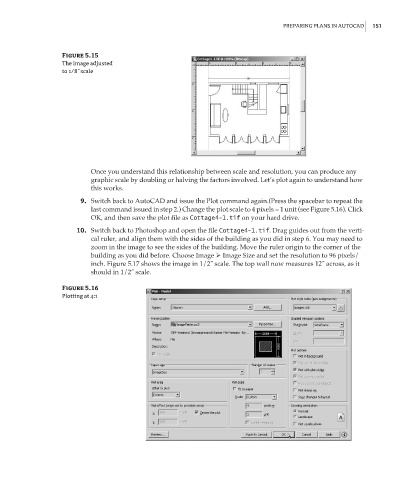
Figure 5.15
The image adjusted
to 1/8˝ scale
Once you understand this relationship between scale and resolution, you can produce any
graphic scale by doubling or halving the factors involved. Let’s plot again to understand how
this works.
9. Switch back to AutoCAD and issue the Plot command again.(Press the spacebar to repeat the
last command issued in step 2.) Change the plot scale to 4 pixels = 1 unit (see Figure 5.16). Click
OK, and then save the plot file as Cottage4-1.tif on your hard drive.
10. Switch back to Photoshop and open the file Cottage4-1.tif. Drag guides out from the verti-
cal ruler, and align them with the sides of the building as you did in step 6. You may need to
zoom in the image to see the sides of the building. Move the ruler origin to the corner of the
building as you did before. Choose Image Image Size and set the resolution to 96 pixels/
inch. Figure 5.17 shows the image in 1/2˝ scale. The top wall now measures 12˝ across, as it
should in 1/2˝ scale.
Figure 5.16
Plotting at 4:1