
Page 165 - Enhancing CAD Drawings with Photoshop
P. 165
4386.book Page 149 Monday, November 15, 2004 3:27 PM
PREPARING PLANS IN AUTOCAD 149
Click the drop-down in the Paper Size group and select ImageSize. (This is the 2000×2000 pixel
custom size you made earlier.) In the Plot Area group, choose the Extents option for What To
Plot. Check Center The Plot in the Plot Offset group and select 1:1 for the scale option (1 pixel =
1 unit). Next, click the right arrow button to see more options.
3. The Plot dialog box expands to show more options. Choose Images.ctb from the Plot Style
Table drop-down. If a dialog box appears asking if you want to assign this plot style table to
all layouts, click Yes. Make sure Plot With Plot Styles is checked in the Plot Options group and
click OK to open the Browse For Plot File dialog box.
4. Navigate to a folder on your hard drive where you are saving project files, and title the new file
Cottage1-1.tif to indicate that it is plotted at 1:1 with the ImagePrinter. Leave AutoCAD open.
5. Launch Photoshop, and open Cottage1-1.tif. Double-click the Zoom tool in the toolbox to
go to 100% magnification. Press Ctrl+R or choose View Rulers to turn on the rulers.
You can use guides to visually connect the edges of the building and the rulers. You can also
move the origin point of the rulers to coincide with the corner of the building. This way, you
can accurately measure the length of the top wall.
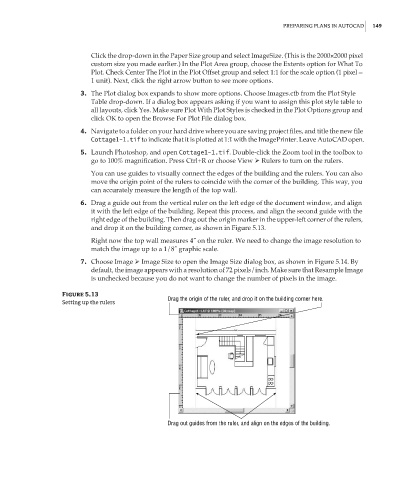
6. Drag a guide out from the vertical ruler on the left edge of the document window, and align
it with the left edge of the building. Repeat this process, and align the second guide with the
right edge of the building. Then drag out the origin marker in the upper-left corner of the rulers,
and drop it on the building corner, as shown in Figure 5.13.
Right now the top wall measures 4˝ on the ruler. We need to change the image resolution to
match the image up to a 1/8˝ graphic scale.
7. Choose Image Image Size to open the Image Size dialog box, as shown in Figure 5.14. By
default, the image appears with a resolution of 72 pixels/inch. Make sure that Resample Image
is unchecked because you do not want to change the number of pixels in the image.
Figure 5.13
Drag the origin of the ruler, and drop it on the building corner here.
Setting up the rulers
Drag out guides from the ruler, and align on the edges of the building.