
Page 289 - Enhancing CAD Drawings with Photoshop
P. 289
4386.book Page 273 Monday, November 15, 2004 3:27 PM
INTEGRATING AND PAINTING IN PHOTOSHOP 273
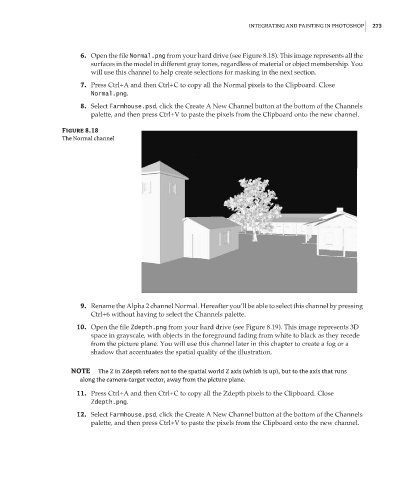
6. Open the file Normal.png from your hard drive (see Figure 8.18). This image represents all the
surfaces in the model in different gray tones, regardless of material or object membership. You
will use this channel to help create selections for masking in the next section.
7. Press Ctrl+A and then Ctrl+C to copy all the Normal pixels to the Clipboard. Close
Normal.png.
8. Select Farmhouse.psd, click the Create A New Channel button at the bottom of the Channels
palette, and then press Ctrl+V to paste the pixels from the Clipboard onto the new channel.
Figure 8.18
The Normal channel
9. Rename the Alpha 2 channel Normal. Hereafter you’ll be able to select this channel by pressing
Ctrl+6 without having to select the Channels palette.
10. Open the file Zdepth.png from your hard drive (see Figure 8.19). This image represents 3D
space in grayscale, with objects in the foreground fading from white to black as they recede
from the picture plane. You will use this channel later in this chapter to create a fog or a
shadow that accentuates the spatial quality of the illustration.
NOTE The Z in Zdepth refers not to the spatial world Z axis (which is up), but to the axis that runs
along the camera-target vector, away from the picture plane.
11. Press Ctrl+A and then Ctrl+C to copy all the Zdepth pixels to the Clipboard. Close
Zdepth.png.
12. Select Farmhouse.psd, click the Create A New Channel button at the bottom of the Channels
palette, and then press Ctrl+V to paste the pixels from the Clipboard onto the new channel.