
Page 294 - Enhancing CAD Drawings with Photoshop
P. 294
4386.book Page 278 Monday, November 15, 2004 3:27 PM
278 CHAPTER 8 ILLUSTRATING ARCHITECTURE
10. Press Ctrl+~ to return to the RGB channels. Create a new layer and then add a layer mask.
Click Layer 2’s layer thumbnail to prepare it to receive paint.
Let’s automate the repetitive steps with an action. Before you begin recording, you’ll have to
make another selection on a special channel because this step won’t be part of the action.
11. Press Ctrl+6 to select the Normal channel. On the Options bar, click the New Selection button,
change Tolerance to 20, and check Contiguous.
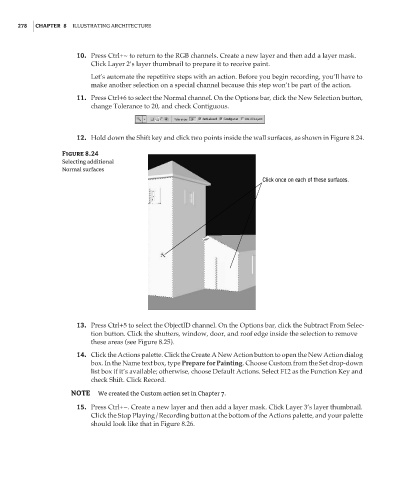
12. Hold down the Shift key and click two points inside the wall surfaces, as shown in Figure 8.24.
Figure 8.24
Selecting additional
Normal surfaces
Click once on each of these surfaces.
13. Press Ctrl+5 to select the ObjectID channel. On the Options bar, click the Subtract From Selec-
tion button. Click the shutters, window, door, and roof edge inside the selection to remove
these areas (see Figure 8.25).
14. Click the Actions palette. Click the Create A New Action button to open the New Action dialog
box. In the Name text box, type Prepare for Painting. Choose Custom from the Set drop-down
list box if it’s available; otherwise, choose Default Actions. Select F12 as the Function Key and
check Shift. Click Record.
NOTE We created the Custom action set in Chapter 7.
15. Press Ctrl+~. Create a new layer and then add a layer mask. Click Layer 3’s layer thumbnail.
Click the Stop Playing/Recording button at the bottom of the Actions palette, and your palette
should look like that in Figure 8.26.