
Page 296 - Enhancing CAD Drawings with Photoshop
P. 296
4386.book Page 280 Monday, November 15, 2004 3:27 PM
280 CHAPTER 8 ILLUSTRATING ARCHITECTURE
An almost limitless combination of brush parameters gives you a wide range of painted expres-
sion, including shape, hardness, spacing, textures, dual brush tips, scattering, and dynamic proper-
ties, plus flow and airbrush capabilities. In this tutorial, you’ll use an off-the-shelf brush from one of
the brush libraries that come with Photoshop. On to the fun part!
1. Create a background layer to act as the paper that you paint on: Create a new layer, and drag it to
the bottom of the layer stack. Press D to set the default colors, and then press Ctrl+Delete to fill the
layer with the background color (white). Choose Layer New Background From Layer.
TIP You can optionally fill the background with a color and/or texture to simulate real canvas or
watercolor paper, for example.
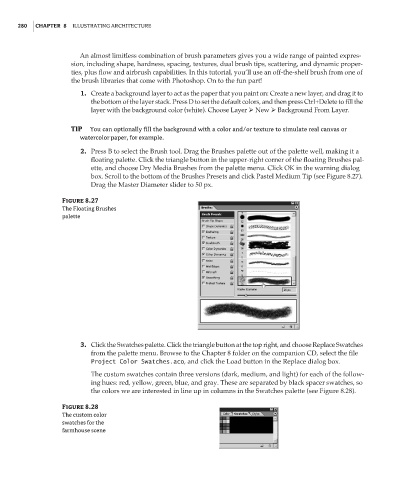
2. Press B to select the Brush tool. Drag the Brushes palette out of the palette well, making it a
floating palette. Click the triangle button in the upper-right corner of the floating Brushes pal-
ette, and choose Dry Media Brushes from the palette menu. Click OK in the warning dialog
box. Scroll to the bottom of the Brushes Presets and click Pastel Medium Tip (see Figure 8.27).
Drag the Master Diameter slider to 50 px.
Figure 8.27
The Floating Brushes
palette
3. Click the Swatches palette. Click the triangle button at the top right, and choose Replace Swatches
from the palette menu. Browse to the Chapter 8 folder on the companion CD, select the file
Project Color Swatches.aco, and click the Load button in the Replace dialog box.
The custom swatches contain three versions (dark, medium, and light) for each of the follow-
ing hues: red, yellow, green, blue, and gray. These are separated by black spacer swatches, so
the colors we are interested in line up in columns in the Swatches palette (see Figure 8.28).
Figure 8.28
The custom color
swatches for the
farmhouse scene