
Page 301 - Enhancing CAD Drawings with Photoshop
P. 301
4386.book Page 285 Monday, November 15, 2004 3:27 PM
INTEGRATING AND PAINTING IN PHOTOSHOP 285
9. Choose Filter Filter Gallery to open the Filter Gallery dialog box. If there are any effects in
the effect layer stack, delete them by clicking the Delete Effect Layer button, repeatedly if nec-
essary (see Chapter 1, “The Basics”). Click the Create New Effect Layer button, expand the
Brush Strokes folder, and select Accented Edges. Set Edge Width to 1, Edge Brightness to 33,
and Smoothness to 4.
10. Click the Create New Effect Layer button again. Select the Angled Strokes filter in the Brush
Strokes folder. Set Direction Balance to 28, Stroke Length to 25, and Sharpness to 6.
11. Once more click the Create New Effect Layer button. Expand the Artistic folder and select the
Dry Brush filter. Set Brush Size to 2, Brush Detail to 4, and Texture to 1.
12. Add additional effect layers and/or tweak the settings given in steps 9 through 11 if desired
to produce a hand-illustrated look for the Sky layer. You can zoom in and out by holding down
the Alt and/or Ctrl keys while clicking in the preview window of the Filter Gallery dialog box.
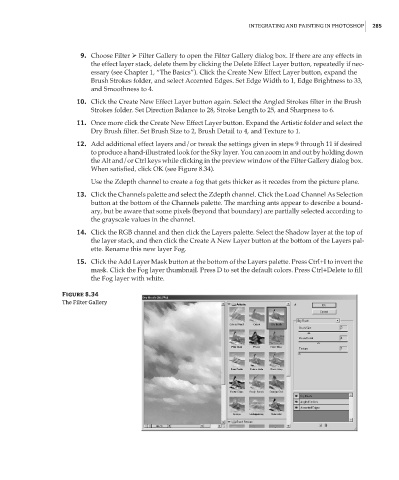
When satisfied, click OK (see Figure 8.34).
Use the Zdepth channel to create a fog that gets thicker as it recedes from the picture plane.
13. Click the Channels palette and select the Zdepth channel. Click the Load Channel As Selection
button at the bottom of the Channels palette. The marching ants appear to describe a bound-
ary, but be aware that some pixels (beyond that boundary) are partially selected according to
the grayscale values in the channel.
14. Click the RGB channel and then click the Layers palette. Select the Shadow layer at the top of
the layer stack, and then click the Create A New Layer button at the bottom of the Layers pal-
ette. Rename this new layer Fog.
15. Click the Add Layer Mask button at the bottom of the Layers palette. Press Ctrl+I to invert the
mask. Click the Fog layer thumbnail. Press D to set the default colors. Press Ctrl+Delete to fill
the Fog layer with white.
Figure 8.34
The Filter Gallery