
Page 298 - Enhancing CAD Drawings with Photoshop
P. 298
4386.book Page 282 Monday, November 15, 2004 3:27 PM
282 CHAPTER 8 ILLUSTRATING ARCHITECTURE
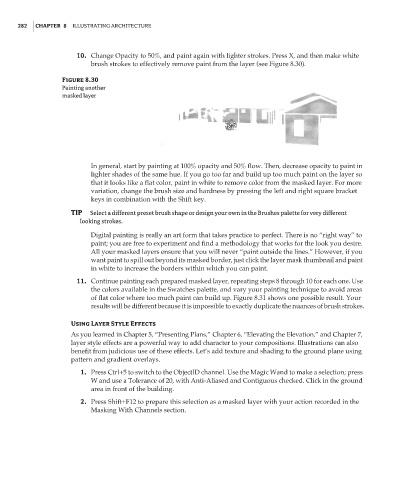
10. Change Opacity to 50%, and paint again with lighter strokes. Press X, and then make white
brush strokes to effectively remove paint from the layer (see Figure 8.30).
Figure 8.30
Painting another
masked layer
In general, start by painting at 100% opacity and 50% flow. Then, decrease opacity to paint in
lighter shades of the same hue. If you go too far and build up too much paint on the layer so
that it looks like a flat color, paint in white to remove color from the masked layer. For more
variation, change the brush size and hardness by pressing the left and right square bracket
keys in combination with the Shift key.
TIP Select a different preset brush shape or design your own in the Brushes palette for very different
looking strokes.
Digital painting is really an art form that takes practice to perfect. There is no “right way” to
paint; you are free to experiment and find a methodology that works for the look you desire.
All your masked layers ensure that you will never “paint outside the lines.” However, if you
want paint to spill out beyond its masked border, just click the layer mask thumbnail and paint
in white to increase the borders within which you can paint.
11. Continue painting each prepared masked layer, repeating steps 8 through 10 for each one. Use
the colors available in the Swatches palette, and vary your painting technique to avoid areas
of flat color where too much paint can build up. Figure 8.31 shows one possible result. Your
results will be different because it is impossible to exactly duplicate the nuances of brush strokes.
Using Layer Style Effects
As you learned in Chapter 5, “Presenting Plans,” Chapter 6, “Elevating the Elevation,” and Chapter 7,
layer style effects are a powerful way to add character to your compositions. Illustrations can also
benefit from judicious use of these effects. Let’s add texture and shading to the ground plane using
pattern and gradient overlays.
1. Press Ctrl+5 to switch to the ObjectID channel. Use the Magic Wand to make a selection; press
W and use a Tolerance of 20, with Anti-Aliased and Contiguous checked. Click in the ground
area in front of the building.
2. Press Shift+F12 to prepare this selection as a masked layer with your action recorded in the
Masking With Channels section.