
Page 300 - Enhancing CAD Drawings with Photoshop
P. 300
4386.book Page 284 Monday, November 15, 2004 3:27 PM
284 CHAPTER 8 ILLUSTRATING ARCHITECTURE
Finishing Touches
There are just a few finishing touches to add before the illustration is complete: the tree, shadows, the
sky backdrop, and some fog.
1. Toggle the Tree layer on. The rendered 3D tree looks out of place in the illustration. Notice that
there are also white halos around the leaves. Right-click the Tree layer mask and select Add
Layer Mask To Selection from the context menu.
2. You can eliminate the white halos around any composited layer by enlarging and feathering
the selection that defines its mask. Choose Select Modify Expand, enter 2 pixels in the
Expand dialog box, and click OK.
3. Choose Select Feather. Enter 1 pixel in the Feather dialog box and click OK. This softens the
expanded selection border.
4. Create a new layer and add a layer mask. Click the layer thumbnail and rename the new layer
Painted Tree.
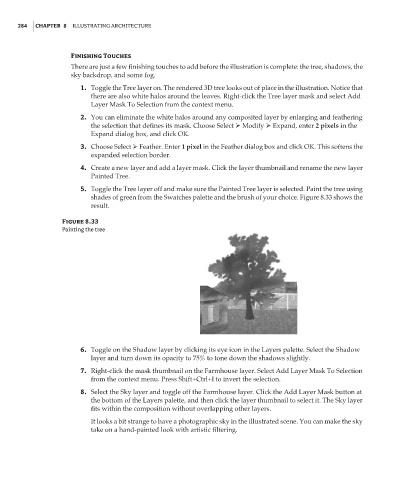
5. Toggle the Tree layer off and make sure the Painted Tree layer is selected. Paint the tree using
shades of green from the Swatches palette and the brush of your choice. Figure 8.33 shows the
result.
Figure 8.33
Painting the tree
6. Toggle on the Shadow layer by clicking its eye icon in the Layers palette. Select the Shadow
layer and turn down its opacity to 75% to tone down the shadows slightly.
7. Right-click the mask thumbnail on the Farmhouse layer. Select Add Layer Mask To Selection
from the context menu. Press Shift+Ctrl+I to invert the selection.
8. Select the Sky layer and toggle off the Farmhouse layer. Click the Add Layer Mask button at
the bottom of the Layers palette, and then click the layer thumbnail to select it. The Sky layer
fits within the composition without overlapping other layers.
It looks a bit strange to have a photographic sky in the illustrated scene. You can make the sky
take on a hand-painted look with artistic filtering.