
Page 203 - Excel Timesaving Techniques for Dummies
P. 203
39_574272 ch34.qxd 10/1/04 10:53 PM Page 188
188
Technique 34: Quick and Easy Insertion and Deletion
so as to leave no gaps in the column. So I select cell
B7 before selecting the Shift Cells Up option in the
Delete dialog box (Edit➪Delete).
• Figure 34-1: Inserting three blank cells in a column of
existing entries.
Figure 34-2 shows you the same worksheet after
shifting the existing entries down and entering the • Figure 34-3: Worksheet after making entries in the three
blank cells in column B.
new home sales figures in cells B5, B6, and B7. Here
Excel has automatically updated the SUM function
Figure 34-4 shows you the result. Here you see the
(now in cell B11 but originally entered in cell B8) to
include the new cells I squeezed in; now they’re part worksheet after removing the mistaken duplicate in
cell B7 and shifting the entries in the cells below up
of its range argument.
one row (from the range B8:B11 up to B7:B10).
• Figure 34-2: Worksheet after making entries in the three
inserted cells in column B. • Figure 34-4: Worksheet after making entries in the three
blank cells in column B.
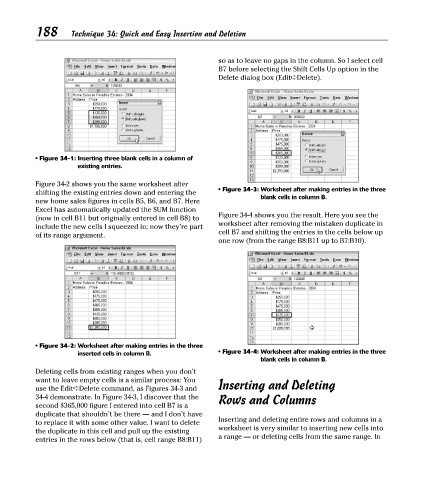
Deleting cells from existing ranges when you don’t
want to leave empty cells is a similar process: You Inserting and Deleting
use the Edit➪Delete command, as Figures 34-3 and
34-4 demonstrate. In Figure 34-3, I discover that the Rows and Columns
second $365,000 figure I entered into cell B7 is a
duplicate that shouldn’t be there — and I don’t have
Inserting and deleting entire rows and columns in a
to replace it with some other value. I want to delete
the duplicate in this cell and pull up the existing worksheet is very similar to inserting new cells into
a range — or deleting cells from the same range. In
entries in the rows below (that is, cell range B8:B11)