
Page 134 - Make Your Own PCBs with EAGLE from Schematic Designs to Finished Boards
P. 134
Before we can add the ground plane, we need to “rip up” the tracks that have just been laid. You
can do this either by using Undo or you can select the Ripup command, select the Group command,
drag over the whole board, and then from the right-click menu select “Group Ripup.”
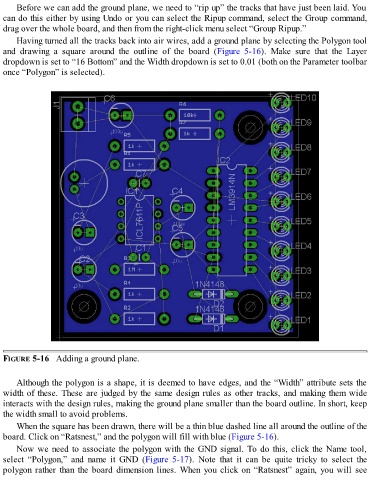
Having turned all the tracks back into air wires, add a ground plane by selecting the Polygon tool
and drawing a square around the outline of the board (Figure 5-16). Make sure that the Layer
dropdown is set to “16 Bottom” and the Width dropdown is set to 0.01 (both on the Parameter toolbar
once “Polygon” is selected).
FIGURE 5-16 Adding a ground plane.
Although the polygon is a shape, it is deemed to have edges, and the “Width” attribute sets the
width of these. These are judged by the same design rules as other tracks, and making them wide
interacts with the design rules, making the ground plane smaller than the board outline. In short, keep
the width small to avoid problems.
When the square has been drawn, there will be a thin blue dashed line all around the outline of the
board. Click on “Ratsnest,” and the polygon will fill with blue (Figure 5-16).
Now we need to associate the polygon with the GND signal. To do this, click the Name tool,
select “Polygon,” and name it GND (Figure 5-17). Note that it can be quite tricky to select the
polygon rather than the board dimension lines. When you click on “Ratsnest” again, you will see