Page 43 - Pressure Vessel Design Manual
P. 43
General Design   29

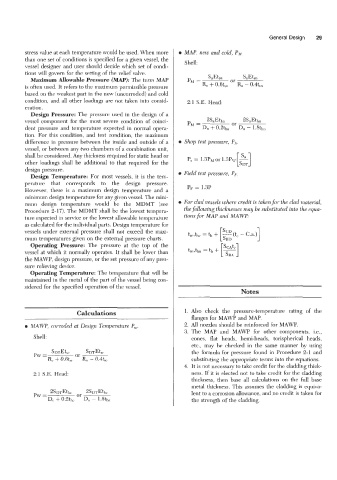
          stress value at each temperature would be used. When more   e  MAP, new and cold, PM
          than one set of conditions is specified for a given vessel, the   Shell:
          vessel designer and user  should decide which  set of condi-
          tions will  govern for the setting of the relief valve.
            Maximum Allowable Pressure (MAP): The term  MAP       PM  =   SaEtsn   or   SaEtsn
          is often used. It refers to the maximum permissible pressure   Rn + 0.6tsn   R,  - 0.4tsn
          based  on the weakest part in the new (uncorroded) and cold
          condition, and all other loadings are not taken into consid-   2:l S.E. Head:
          eration.
            Design Pressure: The pressure  used  in the  design of  a
          vessel  component  for the  most  severe  condition  of  coinci-
          dent pressure  and  temperature  expected in  normal  opera-
          tion.  For  this  condition,  and  test  condition,  the  maximum
          difference  in pressure  between  the  inside  and outside  of  a   e  Shop test pressure, Ps.
          vessel, or between  any two chambers of a combination unit,
          shall be considered. Any thichess required for static head or   P,  = 1.3P~ or 1.3P~ -
          other  loadings shall be  additional  to  that  required  for  the
          design pressure.
            Design  Temperature: For  most  vessels, it  is  the  tem-   e  Field test pressure, PF.
          perature  that  corresponds  to  the  design  pressure.
          However,  there  is  a  maximum  design  temperature  and  a   PF = 1.3P
          minimum design temperature for any given vessel. The mini-
          mum  design  temperature  would  be  the  MDMT  (see   e  For clad vessels where credit is taken for the clad material,
          Procedure  2-17). The MDMT shall be the lowest tempera-   the following thicknesses may be substituted into the equa-
          ture expected in service or the lowest allowable temperature   tions for MAP and MAWP:
          as calculated for the individual parts. Design temperature for
          vessels  under external  pressure  shall not  exceed  the  maxi-
          mum temperatures given on the external pressure  charts.
            Operating  Pressure:  The  pressure  at  the  top  of  the
          vessel at which it normally operates.  It shall be lower than
          the MAWP, design pressure, or the set pressure of any pres-
          sure relieving device.
            Operating Temperature: The temperature  that will  be
          maintained  in the metal of the part of the vessel being con-
          sidered for the specified operation of the vessel.
                                                                                     Notes


                            Calculations                         1. Also  check  the  pressure-temperature  rating  of  the
                                                                    flanges for MAWP and MAP.
          e  MAWP, corroded  at Design  Temperature P,.          2.  All nozzles should be reinforced  for MAWP.
                                                                 3. The  MAP  and  MAWP  for  other  components,  i.e.,
             Shell:                                                 cones,  flat  heads,  hemi-heads,  torispherical  heads,
                                                                    etc.,  may  be  checked  in  the  same  manner  by  using
                                                                    the  formula  for pressure  found  in  Procedure  2-1 and
                                                                    substituting the appropriate terms into the equations.
                                                                 4.  It is not necessary to take credit for the cladding thick-
             2:l  S.E. Head:                                        ness. If it is elected not to take credit for the cladding
                                                                    thickness,  then  base  all  calculations  on  the  full  base
                                                                    metal  thickness.  This  assumes  the cladding is  equiva-
                                                                    lent to a corrosion allowance, and no credit is taken for
                                                                    the strength of the cladding.

