
Page 388 - Robot Builder's Bonanza
P. 388
TOOL CLAMP GRIPPER 357
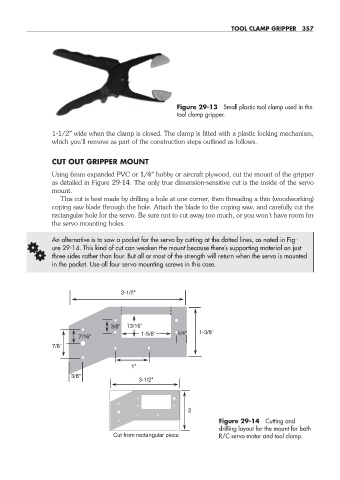
Figure 29- 13 Small plastic tool clamp used in the
tool clamp gripper.
1- 1/2″ wide when the clamp is closed. The clamp is fitted with a plastic locking mechanism,
which you’ll remove as part of the construction steps outlined as follows.
CUT OUT GRIPPER MOUNT
Using 6mm expanded PVC or 1/4″ hobby or aircraft plywood, cut the mount of the gripper
as detailed in Figure 29- 14. The only true dimension- sensitive cut is the inside of the servo
mount.
This cut is best made by drilling a hole at one corner, then threading a thin (woodworking)
coping saw blade through the hole. Attach the blade to the coping saw, and carefully cut the
rectangular hole for the servo. Be sure not to cut away too much, or you won’t have room for
the servo mounting holes.
An alternative is to saw a pocket for the servo by cutting at the dotted lines, as noted in Fig-
G ure 29- 14. This kind of cut can weaken the mount because there’s supporting material on just
three sides rather than four. But all or most of the strength will return when the servo is mounted
in the pocket. Use all four servo mounting screws in this case.
3-1/2"
3/8" 13/16"
1-5/8" 1/4" 1-3/8"
7/16"
7/8"
1"
3/8"
3-1/2"
2
Figure 29- 14 Cutting and
drilling layout for the mount for both
Cut from rectangular piece R/C servo motor and tool clamp.
29-chapter-29.indd 357 4/21/11 4:20 PM