
Page 390 - Robot Builder's Bonanza
P. 390
ON THE WEB: MORE GRIPPER PLANS 359
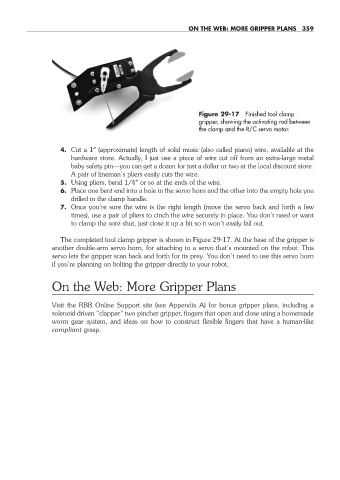
Figure 29- 17 Finished tool clamp
gripper, showing the activating rod between
the clamp and the R/C servo motor.
4. Cut a 1″ (approximate) length of solid music (also called piano) wire, available at the
hardware store. Actually, I just use a piece of wire cut off from an extra- large metal
baby safety pin— you can get a dozen for just a dollar or two at the local discount store.
A pair of lineman’s pliers easily cuts the wire.
5. Using pliers, bend 1/4″ or so at the ends of the wire.
6. Place one bent end into a hole in the servo horn and the other into the empty hole you
drilled in the clamp handle.
7. Once you’re sure the wire is the right length (move the servo back and forth a few
times), use a pair of pliers to cinch the wire securely in place. You don’t need or want
to clamp the wire shut, just close it up a bit so it won’t easily fall out.
The completed tool clamp gripper is shown in Figure 29- 17. At the base of the gripper is
another double- arm servo horn, for attaching to a servo that’s mounted on the robot. This
servo lets the gripper scan back and forth for its prey. You don’t need to use this servo horn
if you’re planning on bolting the gripper directly to your robot.
On the Web: More Gripper Plans
Visit the RBB Online Support site (see Appendix A) for bonus gripper plans, including a
solenoid- driven “clapper” two- pincher gripper, fingers that open and close using a homemade
worm gear system, and ideas on how to construct flexible fingers that have a human- like
compliant grasp.
29-chapter-29.indd 359 4/21/11 11:53 AM