
Page 441 - Robot Builder's Bonanza
P. 441
410 USING SOLDERLESS BREADBOARDS
Strip off
1/2" insulation
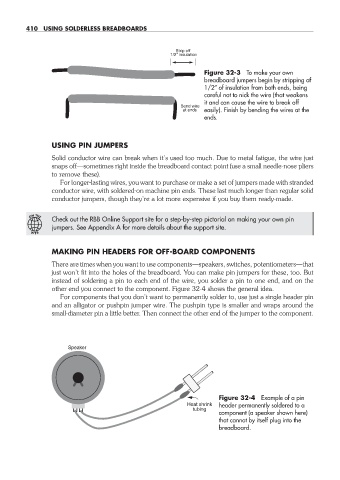
Figure 32- 3 To make your own
breadboard jumpers begin by stripping of
1/2″ of insulation from both ends, being
careful not to nick the wire (that weakens
it and can cause the wire to break off
Bend wire
at ends easily). Finish by bending the wires at the
ends.
USING PIN JUMPERS
Solid conductor wire can break when it’s used too much. Due to metal fatigue, the wire just
snaps off— sometimes right inside the breadboard contact point (use a small needle- nose pliers
to remove these).
For longer- lasting wires, you want to purchase or make a set of jumpers made with stranded
conductor wire, with soldered- on machine pin ends. These last much longer than regular solid
conductor jumpers, though they’re a lot more expensive if you buy them ready- made.
ON THE
Check out the RBB Online Support site for a step- by- step pictorial on making your own pin
jumpers. See Appendix A for more details about the support site.
W E B
MAKING PIN HEADERS FOR OFF- BOARD COMPONENTS
There are times when you want to use components— speakers, switches, potentiometers— that
just won’t fit into the holes of the breadboard. You can make pin jumpers for these, too. But
instead of soldering a pin to each end of the wire, you solder a pin to one end, and on the
other end you connect to the component. Figure 32- 4 shows the general idea.
For components that you don’t want to permanently solder to, use just a single header pin
and an alligator or pushpin jumper wire. The pushpin type is smaller and wraps around the
small- diameter pin a little better. Then connect the other end of the jumper to the component.
Speaker
Figure 32- 4 Example of a pin
Heat shrink header permanently soldered to a
tubing
component (a speaker shown here)
that cannot by itself plug into the
breadboard.
32-chapter-32.indd 410 4/21/11 11:56 AM