
Page 443 - Robot Builder's Bonanza
P. 443
412 USING SOLDERLESS BREADBOARDS
Use a new board, one where the spring contacts aren’t already getting loose. The low
price of a small breadboard means you can keep a stock of these and use them as
needed.
Firmly seat all components, including resistors, capacitors, and diodes. This means you
need to trim the lead lengths so that the body of the component sits flush with the sur-
face of the board.
Cut jumpers to length, and carefully route them around components and other jumpers
so that none will accidentally pull out. Push the jumpers flush against the board.
G To help prevent parts and wires from coming loose, strap them in using some rubber bands.
Avoid the use of things like cling plastic wrap for storing food. This generates lots of static
electricity when you apply and remove it, possibly ruining your circuit.
Mounting the Breadboard to Your Robot
If you’re using the breadboard directly on your robot, you’ll want to securely mount it to keep
it in place. Otherwise it may fall off the next time your bot does a pirouette turn, and all your
hard work will be ruined as parts scatter onto the floor.
If the breadboard is readily accessible— so you can work on it— you can simply use
double- sided foam tape to secure it to the robot (see Figure 32- 6). Otherwise, use Velcro or
other hook- and- loop material, so you can peel the board off to work on it.
When double- sided tape and Velcro won’t work, use long cable ties to hold the board in
place. Use two wraps, one at each end. Cinch the tie for a secure fit. If you need to later
remove the board (so you can work on it on your bench), just cut the ties and discard. Use new
cable ties when you’re ready to remount the board on your robot.
Some breadboards, such as the Global Specialties EXP- 350, have mounting holes in the
corners. The holes are usually pretty small, so you need 4- 40 or maybe 2- 56 miniature screws
and nuts. The EXP- 350 accepts 4- 40 machine screws and nuts; use flathead screws for a flush
look. Or it accepts 6- 32 screws from the back, which tap straight into the plastic.
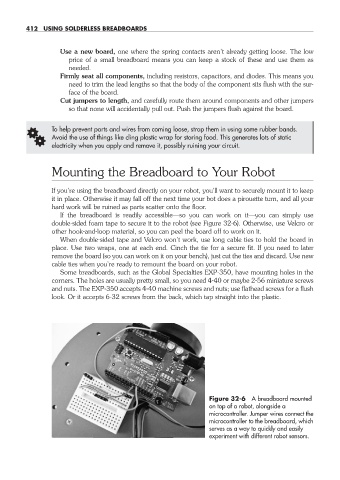
Figure 32- 6 A breadboard mounted
on top of a robot, alongside a
microcontroller. Jumper wires connect the
microcontroller to the breadboard, which
serves as a way to quickly and easily
experiment with different robot sensors.
32-chapter-32.indd 412 4/21/11 11:56 AM