
Page 104 - The Ultimate Palm Robot
P. 104
Color profile: Generic CMYK printer profile
Composite Default screen
Bots /The Ultimate Palm Robot/ Mukhar & Johnson / 222880-6 / Chapter 4
Chapter 4 Using Palm VIIs and Handspring Visors 87
at a time and immediately cool the board after each pin is melted. Then reap-
ply the soldering iron to work on the next pin, cooling it immediately as soon
as the pin is gone. Work your way around the chip this way.
The Robot Geek Says
Methods for Removing Solder
You can use a number of tools for removing solder from a connection.
We recommend these:
✖ Suction This involves using a device that sucks up melted solder. Use a
tool designed for that, not a straw and your lips (Dave learned this the hard
way). Radio Shack #64-2098 “Vacuum Desoldering Tool” is one choice.
✖ Solder wick This consists of a braid of wire that wicks up molten
solder from a connection.
Gently remove the chip from the board. You may need to use a small Exacto
knife or a similar sharp instrument to remove the chip. Again, take care not to
damage the board. After the chip is removed, examine the circuit board to en-
sure that no stray solder has short circuited any of the connections. If you see
any stray solder, carefully clean it off the board with your Exacto knife or with
the soldering iron and solder removal device.
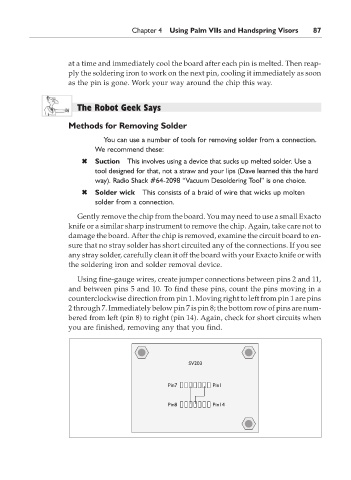
Using fine-gauge wires, create jumper connections between pins 2 and 11,
and between pins 5 and 10. To find these pins, count the pins moving in a
counterclockwise direction from pin 1. Moving right to left from pin 1 are pins
2 through 7. Immediately below pin 7 is pin 8; the bottom row of pins are num-
bered from left (pin 8) to right (pin 14). Again, check for short circuits when
you are finished, removing any that you find.
P:\010Comp\Bots\880-6\ch04.vp
Monday, May 12, 2003 4:03:11 PM