
Page 77 - 15 Dangerously Mad Projects for the Evil Genius
P. 77
56 15 Dangerously Mad Projects for the Evil Genius
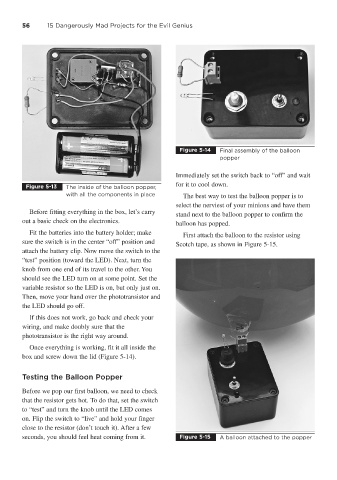
Figure 5-14 Final assembly of the balloon
popper
Immediately set the switch back to “off” and wait
Figure 5-13 The inside of the balloon popper, for it to cool down.
with all the components in place The best way to test the balloon popper is to
select the nerviest of your minions and have them
Before fitting everything in the box, let’s carry stand next to the balloon popper to confirm the
out a basic check on the electronics. balloon has popped.
Fit the batteries into the battery holder; make First attach the balloon to the resistor using
sure the switch is in the center “off” position and
Scotch tape, as shown in Figure 5-15.
attach the battery clip. Now move the switch to the
“test” position (toward the LED). Next, turn the
knob from one end of its travel to the other. You
should see the LED turn on at some point. Set the
variable resistor so the LED is on, but only just on.
Then, move your hand over the phototransistor and
the LED should go off.
If this does not work, go back and check your
wiring, and make doubly sure that the
phototransistor is the right way around.
Once everything is working, fit it all inside the
box and screw down the lid (Figure 5-14).
Testing the Balloon Popper
Before we pop our first balloon, we need to check
that the resistor gets hot. To do that, set the switch
to “test” and turn the knob until the LED comes
on. Flip the switch to “live” and hold your finger
close to the resistor (don’t touch it). After a few
seconds, you should feel heat coming from it. Figure 5-15 A balloon attached to the popper