
Page 560 - Subyek Computer Aided Design - [David Planchard] Engineering Design with SOLIDWORKS
P. 560
Swept, Lofted and Additional Features Engineering Design with SOLIDWORKS® 2018
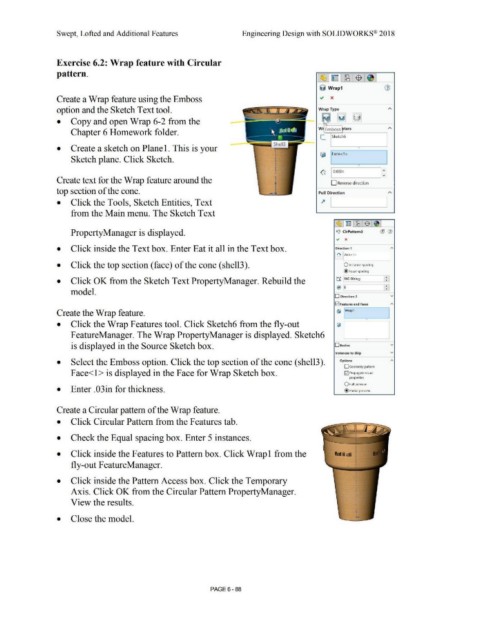
Exercise 6.2: Wrap feature with Circular
pattern.
~-l ~ Lu8 $ I ~ I
(ij Wrap1
Create a Wrap feature using the Emboss
option and the Sketch Text tool.
• Copy and open Wrap 6-2 from the
W Emboss ters
Chapter 6 Homework folder.
[_ Sketch6
• Create a sketch on Plane 1. This is your
(j; 1Face<1>
Sketch plane. Click Sketch. I
•
~ 0.03in
v
1
Create text for the Wrap feature around the D Reverse direction
top section of the cone. Pull Direction
• Click the Tools, Sketch Entities, Text ~ L--1 -------'
from the Main menu. The Sketch Text
~ l~ IW8 l$fel
PropertyManager is displayed. 1>~<1 CirPattern3 (11 (1)
., x
• Click inside the Text box. Enter Eat it all in the Text box. Direction 1 "'
~ l[Axis<1>
I
• Click the top section (face) of the cone (shell3). O Instance spacing
@ Equal spacing
•
t:l'. i360.00deg
• Click OK from the Sketch Text PropertyManager. Rebuild the :::I
*: '5 _!_I
••
•
model.
D Direction 2 v
Iv! Features and Faces
"'
Create the Wrap feature. {li IWrapl I
•
• Click the Wrap Features tool. Click Sketch6 from the fly-out (iii
FeatureManager. The Wrap PropertyManager is displayed. Sketch6
•
is displayed in the Source Sketch box. Deodies v
Instances to Skip v
• Select the Emboss option. Click the top section of the cone (shell3). Options "'
D Geometry pattern
Face<l > is displayed in the Face for Wrap Sketch box. G2J Propagate visual
properties
O Full preview
• Enter .03in for thickness. @ Partial preview
Create a Circular pattern of the Wrap feature.
• Click Circular Pattern from the Features tab.
• Check the Equal spacing box. Enter 5 instances.
I
• Click inside the Features to Pattern box. Click Wrap! from the 1a1,a1 I
fly-out FeatureManager.
• Click inside the Pattern Access box. Click the Temporary
Axis. Click OK from the Circular Pattern PropertyManager.
View the results.
• Close the model.
PAGE6 - 88