Page 36 - Enhancing CAD Drawings with Photoshop
P. 36
4386.book  Page 19  Monday, November 15, 2004  3:27 PM

                                                                                         USING LAYERS  19


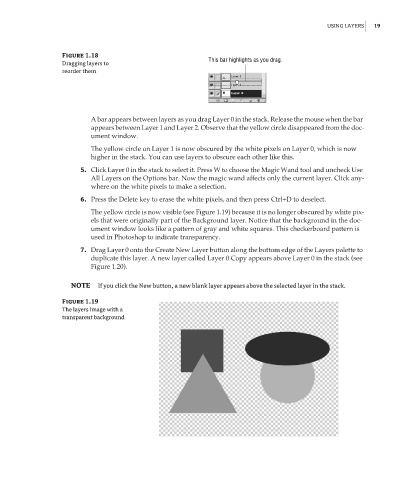
                  Figure 1.18
                                                         This bar highlights as you drag.
                  Dragging layers to
                  reorder them


                          A bar appears between layers as you drag Layer 0 in the stack. Release the mouse when the bar
                          appears between Layer 1 and Layer 2. Observe that the yellow circle disappeared from the doc-
                          ument window.

                          The yellow circle on Layer 1 is now obscured by the white pixels on Layer 0, which is now
                          higher in the stack. You can use layers to obscure each other like this.
                       5. Click Layer 0 in the stack to select it. Press W to choose the Magic Wand tool and uncheck Use
                          All Layers on the Options bar. Now the magic wand affects only the current layer. Click any-
                          where on the white pixels to make a selection.
                       6. Press the Delete key to erase the white pixels, and then press Ctrl+D to deselect.
                          The yellow circle is now visible (see Figure 1.19) because it is no longer obscured by white pix-
                          els that were originally part of the Background layer. Notice that the background in the doc-
                          ument window looks like a pattern of gray and white squares. This checkerboard pattern is
                          used in Photoshop to indicate transparency.
                       7. Drag Layer 0 onto the Create New Layer button along the bottom edge of the Layers palette to
                          duplicate this layer. A new layer called Layer 0 Copy appears above Layer 0 in the stack (see
                          Figure 1.20).


                    NOTE    If you click the New button, a new blank layer appears above the selected layer in the stack.

                  Figure 1.19
                  The layers image with a
                  transparent background

