
Page 35 - Enhancing CAD Drawings with Photoshop
P. 35
4386.book Page 18 Monday, November 15, 2004 3:27 PM
18 CHAPTER 1 THE BASICS
Fortunately, you can organize your layers in several ways and keep them tidy and well identified for
future use. It all starts by understanding the Background layer.
Every new file starts with a single Background layer. By definition, this layer must remain at the
bottom of the stack, so its contents remain in the background of your composition. Let’s take a look
at an example.
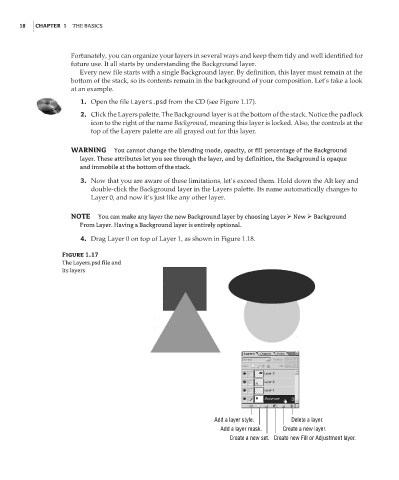
1. Open the file Layers.psd from the CD (see Figure 1.17).
2. Click the Layers palette. The Background layer is at the bottom of the stack. Notice the padlock
icon to the right of the name Background, meaning this layer is locked. Also, the controls at the
top of the Layers palette are all grayed out for this layer.
WARNING You cannot change the blending mode, opacity, or fill percentage of the Background
layer. These attributes let you see through the layer, and by definition, the Background is opaque
and immobile at the bottom of the stack.
3. Now that you are aware of these limitations, let’s exceed them. Hold down the Alt key and
double-click the Background layer in the Layers palette. Its name automatically changes to
Layer 0, and now it’s just like any other layer.
NOTE You can make any layer the new Background layer by choosing Layer New Background
From Layer. Having a Background layer is entirely optional.
4. Drag Layer 0 on top of Layer 1, as shown in Figure 1.18.
Figure 1.17
The Layers.psd file and
its layers
Add a layer style. Delete a layer.
Add a layer mask. Create a new layer.
Create a new set. Create new Fill or Adjustment layer.